Hello.
How can we help you?

How to use Checkbox Webhooks with Zapier
Overview of Checkbox Webhooks
Checkbox webhooks can be added to any page of your survey, allowing you to post real-time response data to an API of your choice. One of the most common tools to integrate with webhooks is Zapier, but you can also create your own API to submit the webhook to.
As an example, this guide will show how to submit your survey response to Zapier, parse the relevant data, and then send a Slack message notifying your team of the survey response. These basic steps can be modified to automate other tasks or actions using Zapier, or to use with your own APIs.
***Important Note: Working with Webhooks is an advanced feature and should only be attempted by users with at least some technical knowledge of APIs and JavaScript.***
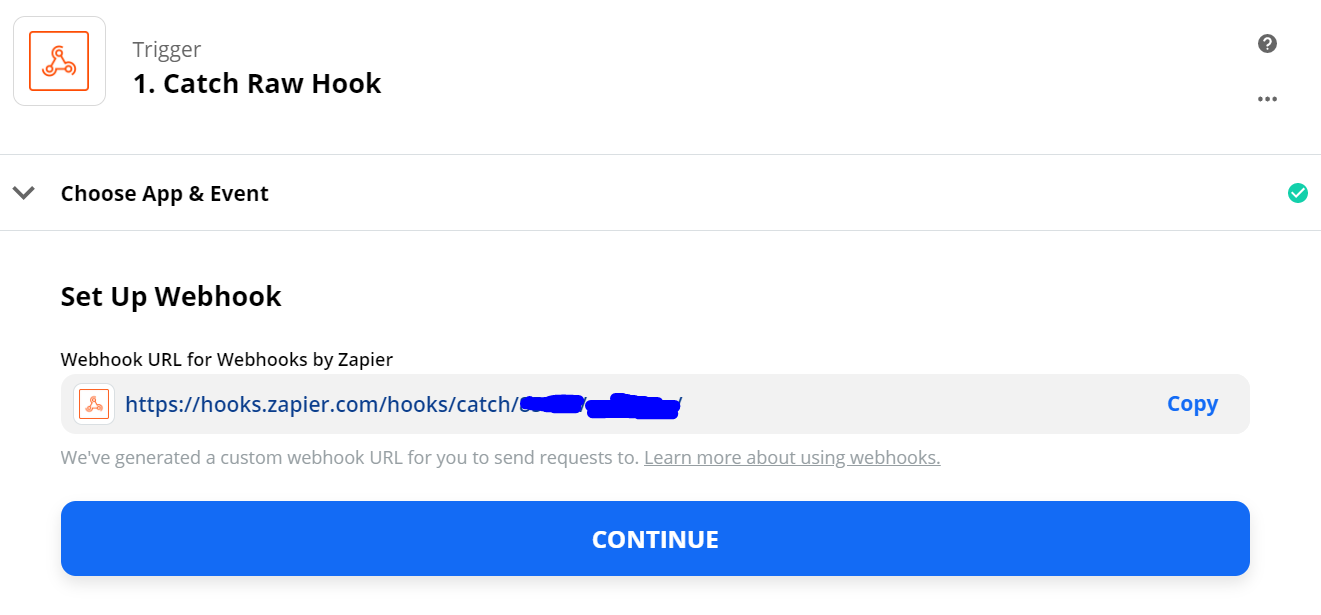
1. Get the Webhook “Post” URL from Zapier
- In Zapier, create a new Zap.
- Select “Zapier Webhook”
- Select “Catch Raw Webhook”
This should result in the screen below. You will want to copy and save the webhook URL for later.
2. Enable the Webhook Item in Checkbox
For security reasons, the webhook item is disabled by default in Checkbox. System administrators can enable the item by going to the Application Settings -> Survey -> Advanced Settings -> Enable webhook item. This step only needs to be performed once, prior to creating your first webhook.
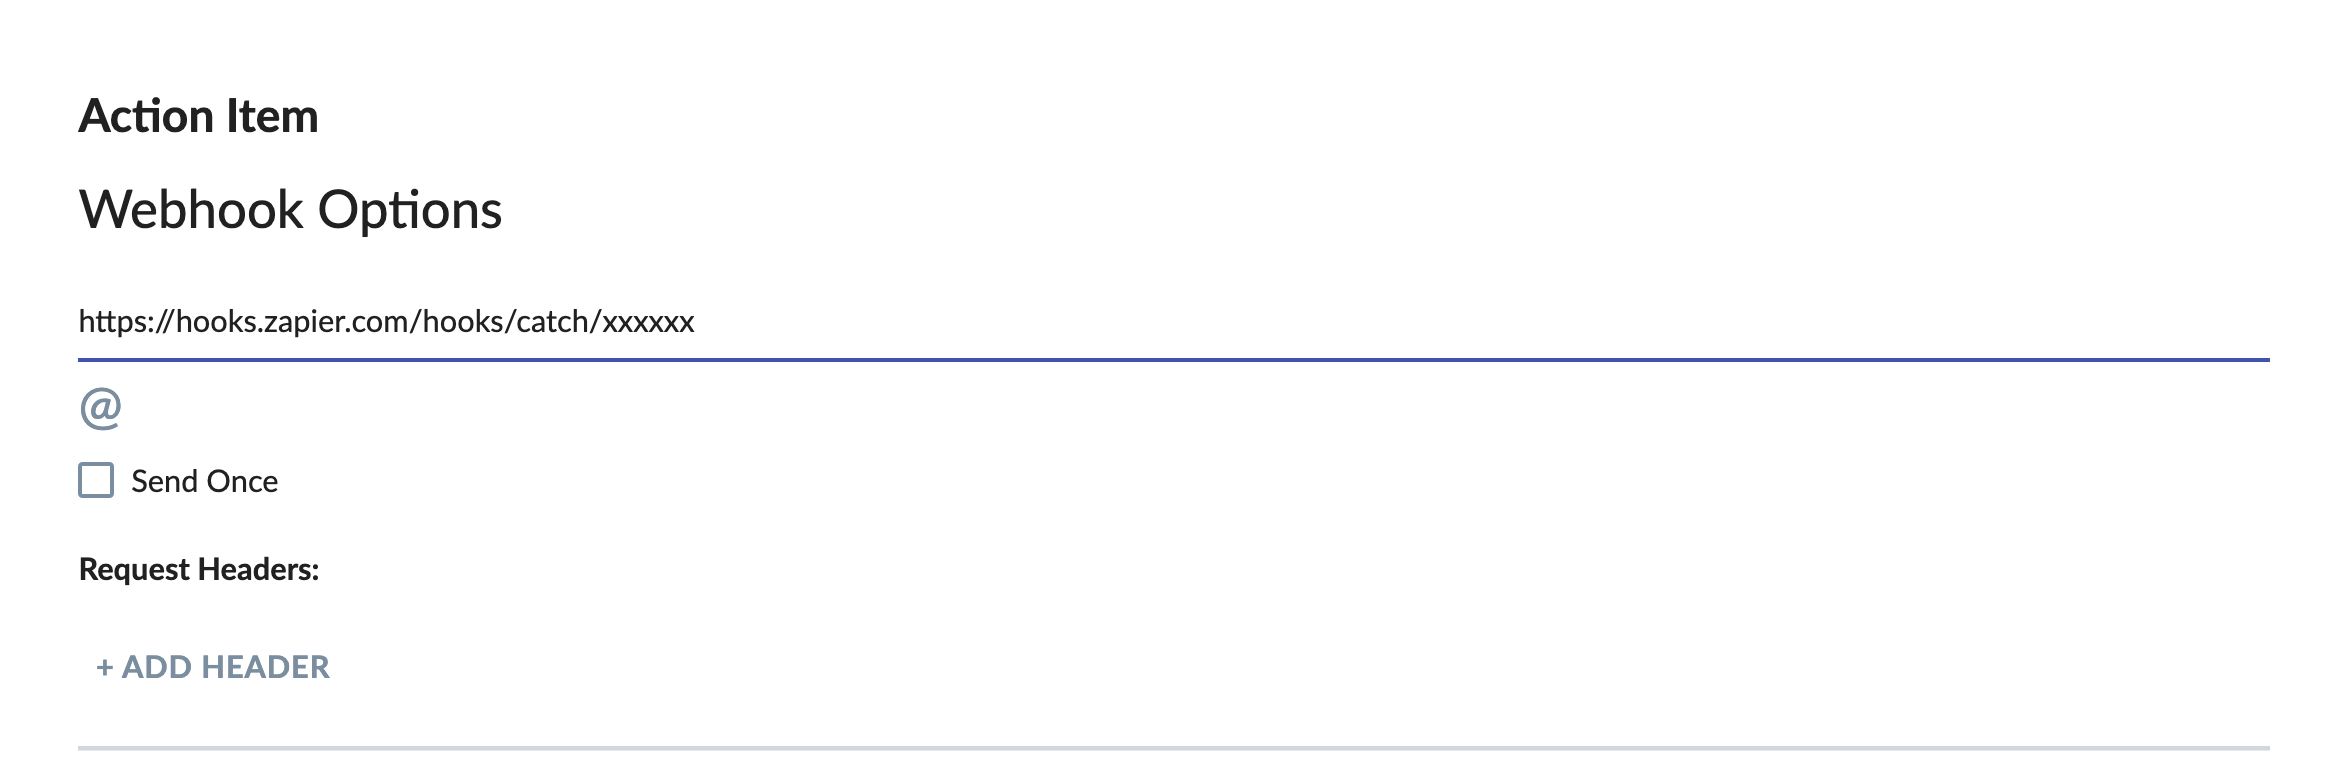
3. Add a Webhook Item to your Survey
Although you can add a webhook item to any page of your survey, it is most commonly added to the Completion Page. Adding the webhook to the Completion Page will result in Checkbox sending the entire response to the API (in this case Zapier) when the respondent submits their response.
- Edit your survey
- Expand the “Completion Page”
- Click “Add Action Item” and choose the Webhook item
- In the Webhook URL field, paste the Zapier Webhook URL that you obtained from Step 1.
4. Test your Webhook
Create a test survey response in Checkbox to test your webhook. This should submit the data to Zapier, which will populate fields on your zap. Testing at this stage will make the following steps easier to complete and test.
5. Add an Action Step to Zapier
This step will allow Zapier to parse your response and extract the necessary data for your Slack notification. Parsing the data requires some JavaScript code - the sample below can be used as a guide (or just copied and pasted), making the noted changes to reference your actual survey items.
In Zapier, add an Action step to your Zap, “Code by Zapier”, and select the option to “Run Javascript”.
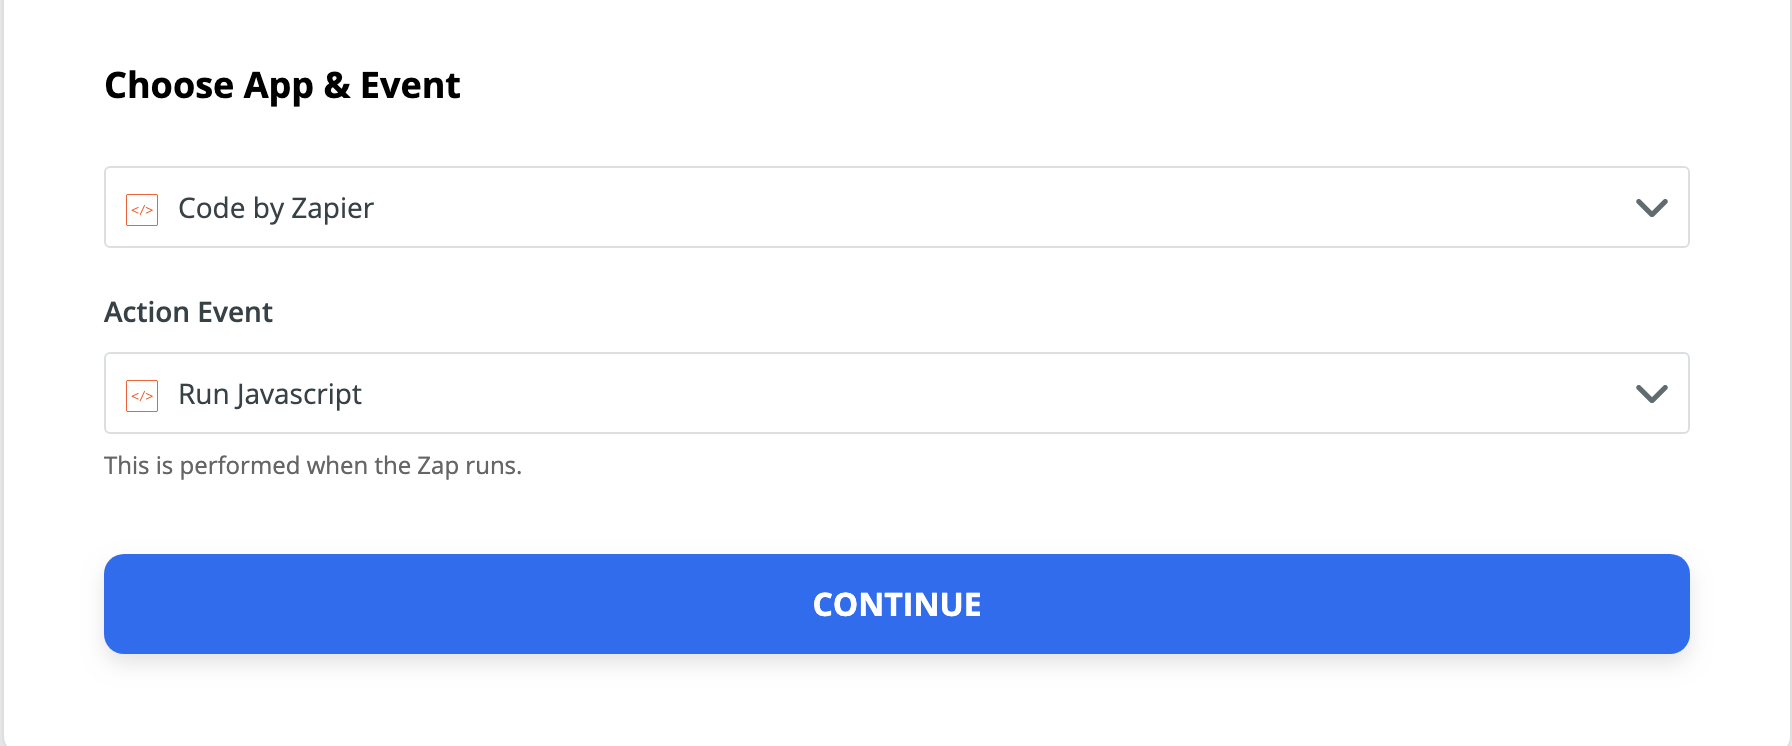
Click Continue and paste the following code, which allows you to access specific pages of your response, into the Code box:
You can now access specific pages of your response in the following way:
*Note that you will want to look at the response returned by your webhook to find the specific page ID for the data of your survey. You will then replace "1778" with that page ID.
You can then get answer data to specific questions like this:
Matrix items are a little more complicated. Matrix item answer data can be obtained like this:
*Important Note: Make sure to change all of the IDs above to match your specific survey.
6. Send your data to Slack.
Once the above steps are completed, click Next to test your action. You should see the data from your test response being populated and ready to send to the next step.
To send this data to Slack (as in this example), add a new step “Send Channel Message in Slack.” Follow the prompts to connect to Slack and choose the channel you'd like to post the response data to.