December 3, 2025
Configuring Okta for SAML
Configuration
Follow these steps to configure Okta as your Checkbox Identity Provider (IdP) for SAML:
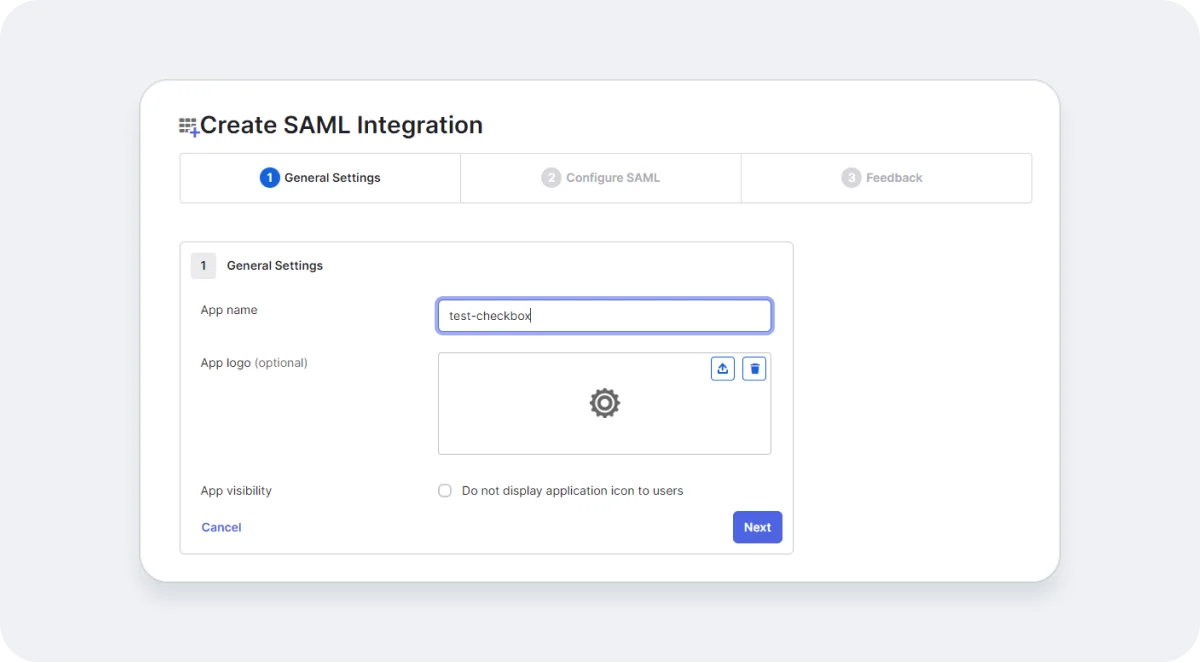
- Log into Okta as an Administrator
- Click on "Create App Integration"
- Select "SAML 2.0" as the Sign-in Method
- Input Application Name
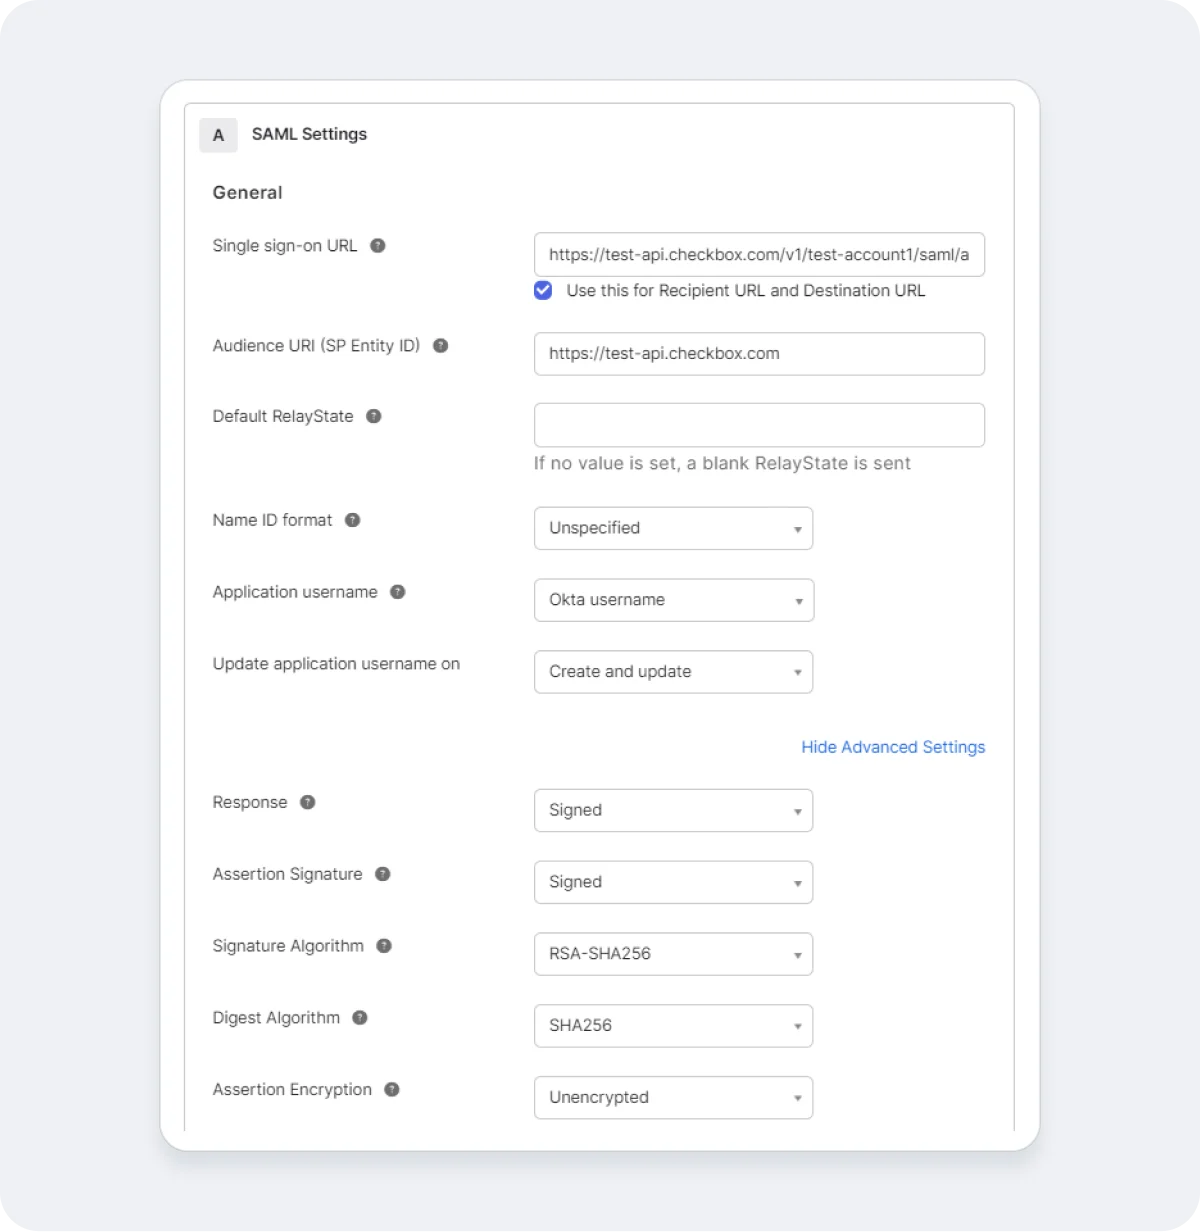
- Input single sign-on URL (see below for instructions)
- Input Audience URI: any string should be matched with the Issuer on the Admin site.
- Select the correct application username: By default, Checkbox uses emails as identifiers. If your Okta does the same, please select “Okta username”. If not, choose “Email”.
- Complete the configuration
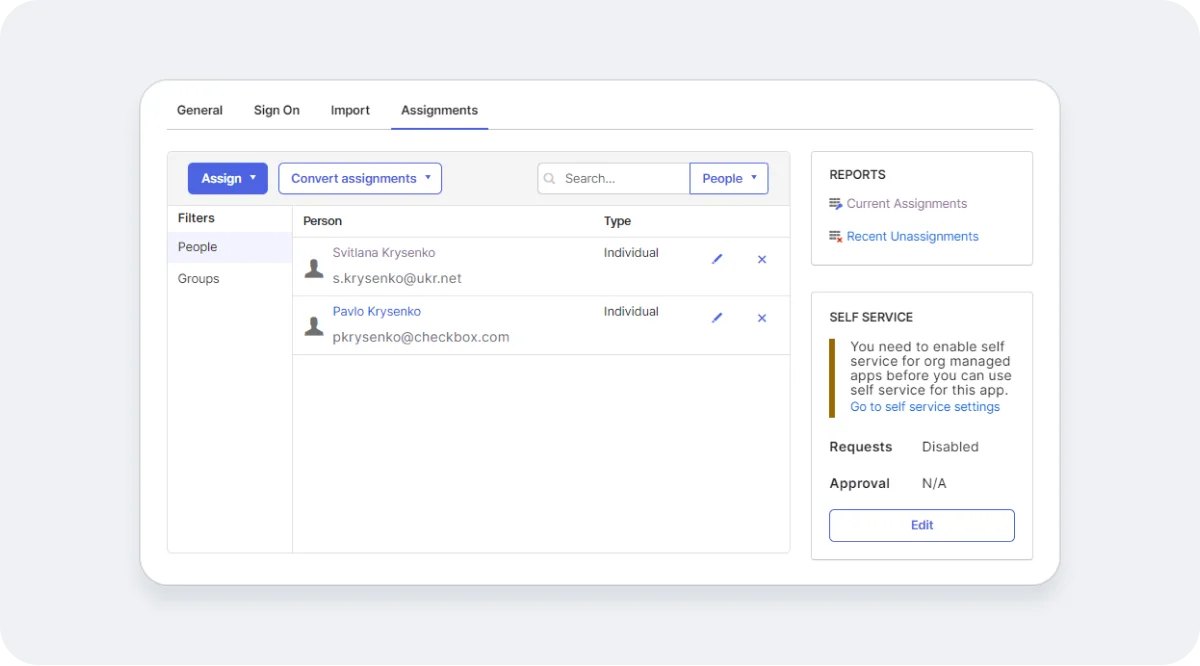
- Add Users and Groups to the newly created Application (see below)
Constructing the Single Sign-On URL
Checkbox Online
The URL should take the format:
https://{api-host}/v1/{account-name}/saml/assertion-consumer-service
Within the Checkbox REST API Docs you will find an overview for how to construct these URLs, summarized below:
- {account-name} - the name of the account that you used on the login page.
- {api-host} - the hostname, depends on region:
- US - api.checkbox.com
- CA - api.checkbox.ca
- EU - api.ckbxeu.com
- AU - api.checkboxau.com
Checkbox On-Premises
The URL should take the following format:
https://{api-host}/v1/saml/assertion-consumer-service
Where {api-host} is the hostname used for your On-Premises installation of Checkbox.
Example Configuration Screenshots

Add People and Groups to Your Application
In order for the authentication to work for individual users, they will need to be assigned to the SAML Application we have configured above.
Properties of Okta Configuration for Checkbox
Metadata URL
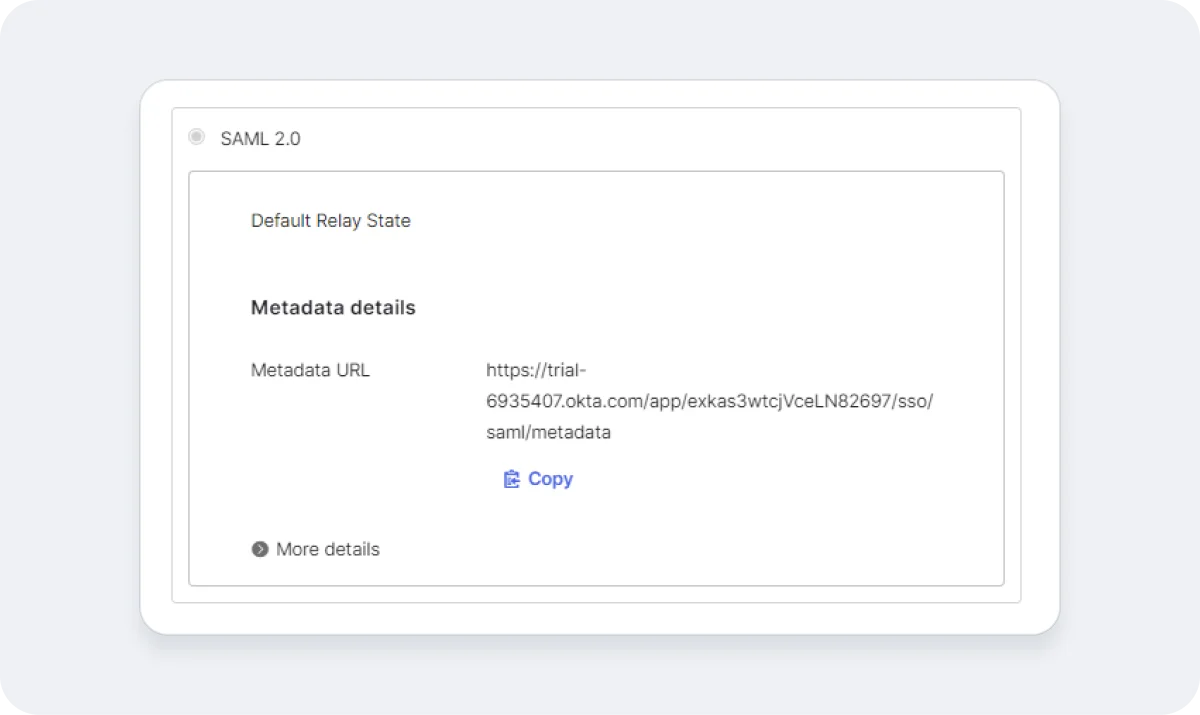
Issuer

Signature Algorithm