

How to share your survey via SMS/Text
Some Important Notes Before You Get Started
Account Limits
SMS/Text survey sharing is an add-on feature for Advanced and Enterprise hosted plans and is included with on-premises licenses. If you would like to distribute your Checkbox surveys via text message but don’t see this option in your account, please contact your Checkbox account manager or email sales@checkbox.com.
The SMS add-on for hosted accounts includes 10,000 text messages per year. Both the initial SMS Campaign and any follow-up reminders count against this limit. You may purchase additional text messages, subject to approval by our sales team. Hosted customers who prefer to use their own personal Twilio phone number will not be subject to our sending limit, but must still purchase the SMS add-on feature. On-premises customers must have their own Twilio account in order to use the SMS feature, and are therefore not subject to the sending limit.
Character Limits
SMS messages are limited to 160 GSM-7 characters or 67 characters if you include non GSM-7 characters in your message. Pay special attention to the instructions on personalizing your message below, as well as the character counter when creating your message, so that your recipients receive your full message text.
Survey Links
Checkbox uses short links when sending SMS messages in order to minimize the characters consumed by the survey URL. When respondents click the short link, they will be redirected to your survey’s Custom or Default URL. Checkbox reserves 25 characters for the survey short link – this is accounted for in the character counter below your message editor.
Your SMS Phone Number
Before you can create and send SMS Campaigns, you (or any System Admin on your account) must choose a phone number that your SMS messages will be sent from. This is done under Account Settings -> Email & SMS -> SMS Settings.
Checkbox only supports sending from US and Canada phone numbers. Once you choose a phone number, it cannot be changed. However, your phone number may be released if you do not send at least 3 texts during any one-month period (this rule is set by our third-party SMS provider, Twilio).
If you would like to send from a non-US or Canada phone number or you would prefer to use your own custom phone number, you may sign up for a Twilio account and enter the phone number and your Twilio credentials in this same Account Settings area. SMS messages sent from your own custom phone number will be billed to your personal Twilio account and will therefore not be subject to our sending limits. Note that on-premises (server) customers will only have the option to use their own custom phone number/Twilio account for sending.
Recipient Phone Numbers
Due to international data privacy restrictions, Checkbox only supports sending SMS messages to US and Canada phone numbers if you choose to send from a Checkbox-provisioned phone number. If you need to send to recipients outside of the US and Canada, you will need to sign up for your own Twilio phone number and enter your Twilio phone number and API credentials in your Checkbox Account Settings. You will then be direct-billed by Twilio for any SMS messages you send via Checkbox.
Unsubscribing and Resubscribing
Your recipients may unsubscribe from text messages from your account by responding to your SMS message with any of the following words:
- STOP
- STOPALL
- UNSUBSCRIBE
- CANCEL
- END
- QUIT
Recipients may resubscribe by replying with any of the following words:
- START
- YES
- UNSTOP
We recommend including instructions in your SMS message to let your respondents know how they can unsubscribe. For example, “Reply STOP to unsubscribe”.
Note that unsubscribe and resubscribe requests will apply to all SMS messages sent from your account, even if your sending phone number is changed.
SPAM Complaints and Abuse
We reserve the right to deactivate SMS sending or deny requests for additional text message purchases from accounts with excessive SPAM complaints. Refunds will not be issued if an account’s SMS sending is deactivated due to SPAM/complaints.
Creating an SMS Campaign
1. Import Your Respondents (optional)
If you are going to send your SMS Campaign to registered Checkbox Contacts (so you can associate details like name or company with your response), you need to import your respondents in the Contacts area before creating your campaign.
For more details on how to create new Contacts in Checkbox, please see our Contact Import Guide. Note that you must populate the SMS_Phone field with the phone number(s) you want to send your survey to – Checkbox cannot use other phone number fields for SMS Campaigns.

If you don’t want to create Contacts, you can simply type or paste phone numbers directly into your SMS Campaign, following the steps below.
2. Create a New SMS Campaign
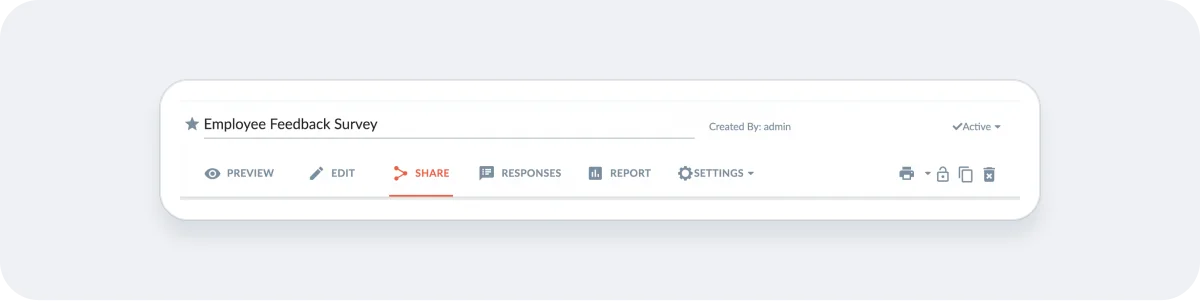
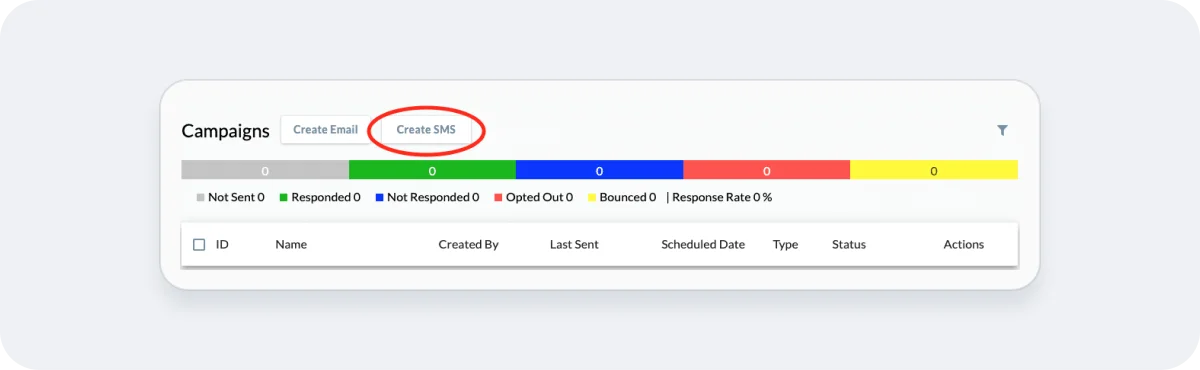
From the Share tab of your survey, click the Create SMS button under the Campaigns header.
3. Set Basic Campaign Options
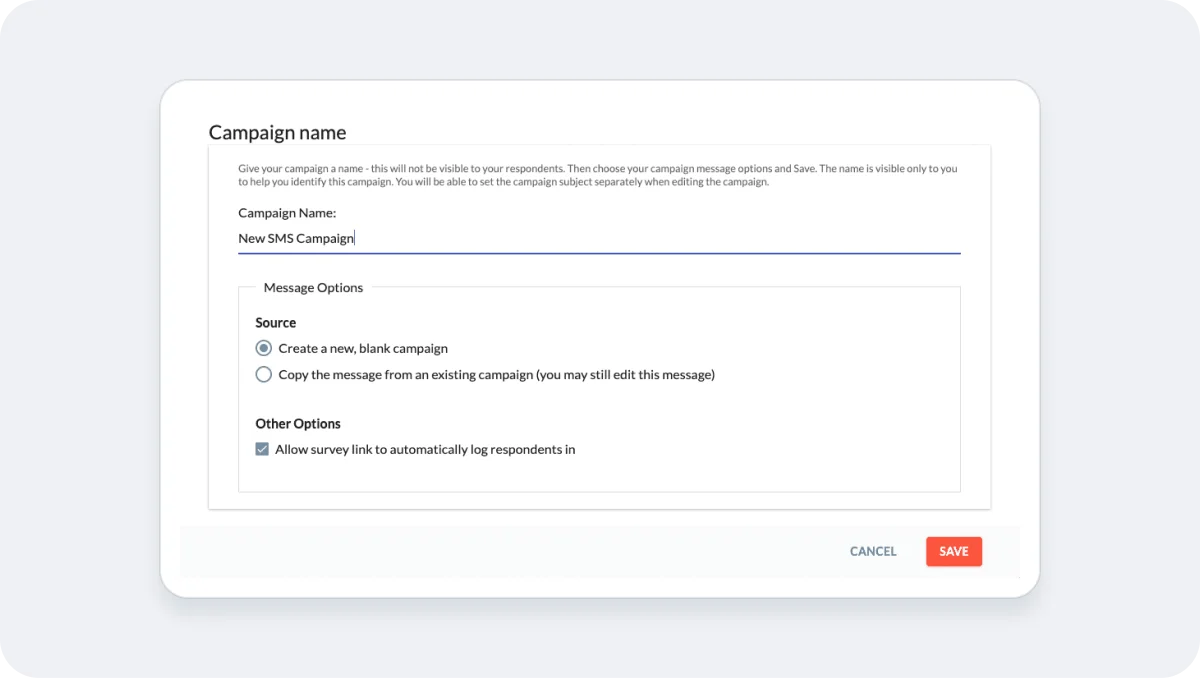
On the Campaign Name screen:
- Give your campaign a name. This will not be shown to respondents, so it should be something that will help you identify the campaign.
- Either create a blank campaign or copy the message and subject from an existing SMS campaign.
- Choose if you want to Allow the allow campaign link to automatically log respondents in. This option is only relevant if you are sending your campaign to Contacts that you have set up in Checkbox. By default, the campaign link sent to Contacts will automatically log them in, allowing you to associate Contact info like name and company with each response. If you uncheck this option and send your campaign to Contacts, they will need to log in to take the survey.
4. Customize Your SMS Campaign Message
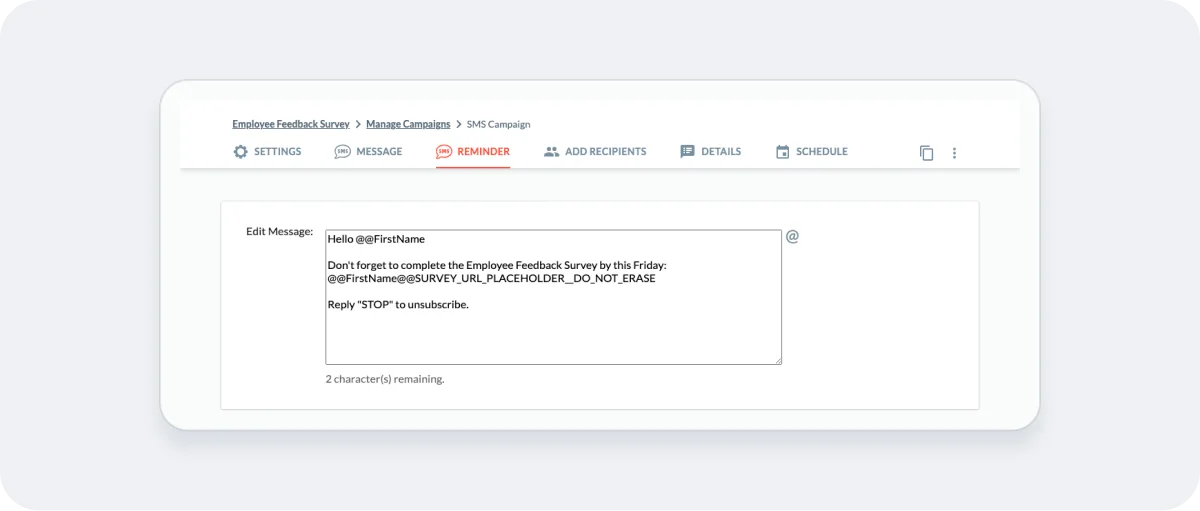
- Enter the message you’d like to send to your recipients. Ensure that you do not enter more than the allowed number of characters. Note that:
- SMS messages are limited to 160 GSM-7 characters or 67 characters if you include non GSM-7 characters in your message.
- Checkbox reserves 10 characters for any merge codes you use, such as @@FIRSTNAME. If you personalize your message using merge codes and the merged value has more than 10 characters, your merged value and/or SMS message may be truncated.
- Checkbox reserves 25 characters for the survey URL. This is accounted for in the character counter.
- Do not delete or modify the survey URL merge code – @@SURVEY_URL_PLACEHOLDER__DO_NOT_ERASE. You will not be able to save your SMS message if this code is deleted or modified.
- We recommend including instructions in your SMS message to let your respondents know how they can unsubscribe. For example, “Reply STOP to unsubscribe”.
- Click Save.

5. Customize your Reminder Message (optional)
If you plan to send follow-up reminders, you can add a separate message for your reminder emails. The same character limits apply to your reminder message – see #4 above.
6. Add Your Recipients
You will add your SMS Campaign recipients on the Add Recipients tab. You may choose one or more of the following options after clicking the Add Recipients button:
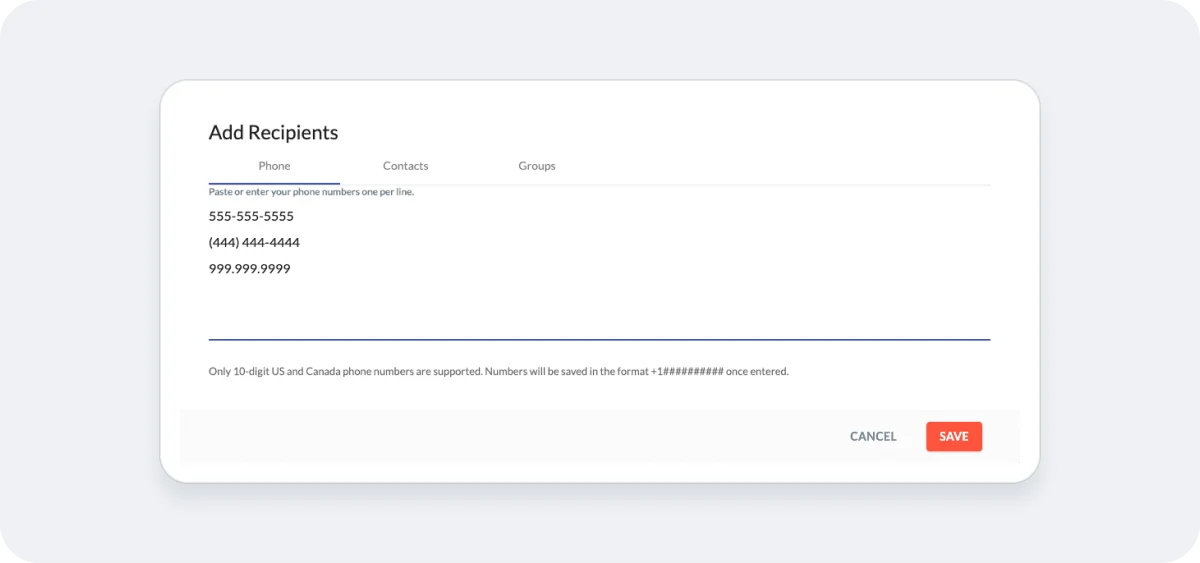
- Phone Numbers – Type or paste phone numbers directly into into the text field on the Phone tab. Phone numbers should be entered one per line.
- If you are sending from a Checkbox phone number, your recipient phone numbers must be 10-digit US or Canada numbers. Phone numbers will be saved in the international format +1##########.
- If you are sending from your own Twilio phone number, you may enter recipient phone numbers from any country but you must include + and the country code along with the phone number.
- Contacts – You may choose to add one or more respondents that you have imported into the Checkbox Contacts area. See this guide for more details.
- Groups – You may choose to add one or more Contact Groups that you have previously created. See this guide for more details.
TIP: If you want to be able to personalize your message or survey with custom Contact profile information like name or company, you need to use the Contacts or Group option.
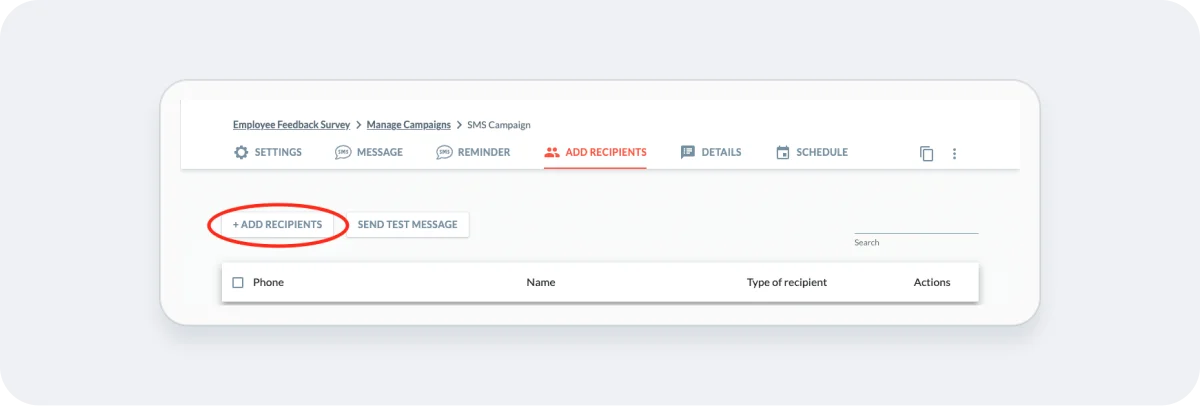
7. Send a Test Message (optional)
To send yourself or someone else a test SMS message, click the Send Test Message button on the Add Recipients tab and enter a 10-digit US or Canada phone number. You can send as many tests as you’d like.

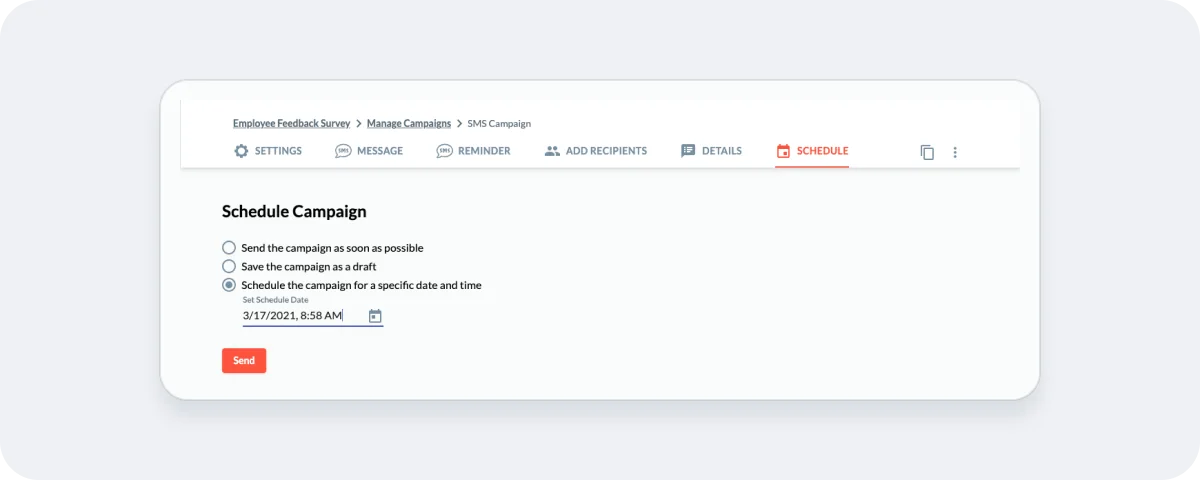
8. Send or Schedule your Campaign
On the Schedule screen you can choose to:
- Send the Campaign as soon as possible. The messages will be queued to send as soon as you select Send.
- Schedule the Campaign for a specific date and time. If this option is selected, click into the date field to view a date/time picker.
- Save the Campaign as a draft for later sending or scheduling.
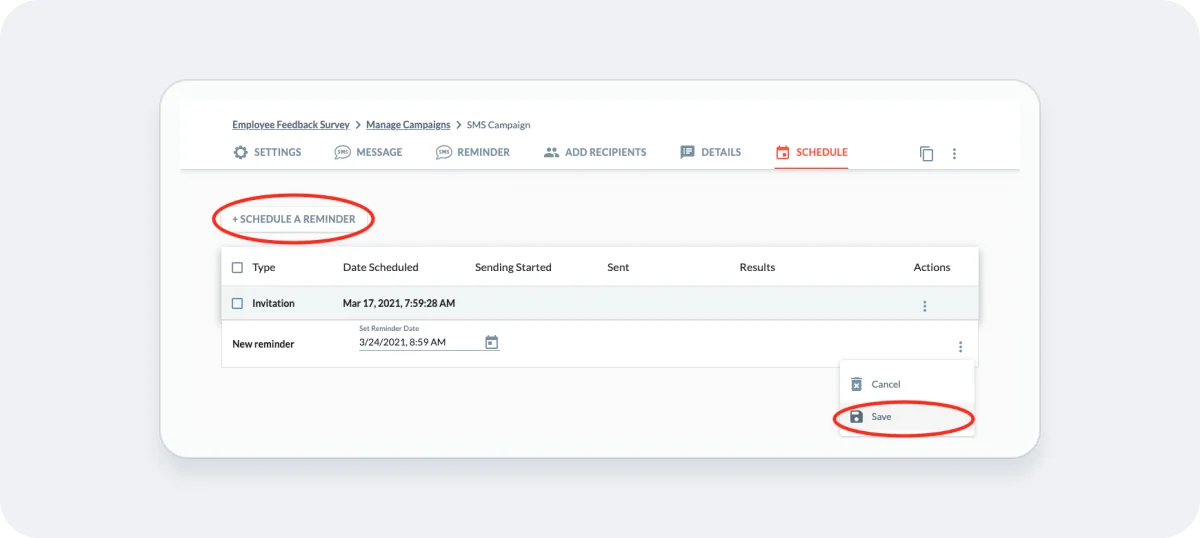
9. Schedule your Reminder(s) (optional)
Once you have scheduled or sent your campaign, you will see a Schedule a Reminder button appear on the Schedule tab. Click this to select the date and time you’d like to send your reminder – you may schedule one or more reminders. Make sure to click Save under the 3-dot icon to save your reminder schedule.
10. Modifying Your Campaign Schedule
Scheduled campaigns can be modified up until the point that they are queued for sending (about 5 minutes before your scheduled send time). To edit your schedule, click the Edit option under the 3-dot icon on the Schedule tab.
