

How to configure SAML
The steps to configure SAML will depend on your Identity Provider (IdP). This guide will cover the initial steps.
To complete configuration, follow the additional steps found below for your IdP. If you do not see your IdP listed, contact us at support@checkbox.com for more help.
Configuration Admin Application
Follow these steps to enable SAML on your Checkbox account:
- Log in as an admin user
- Navigate to “Account settings”
- Select “System preferences” tab
- Click on “Enable SAML”
- Fill in all properties (see below)
- Save configuration
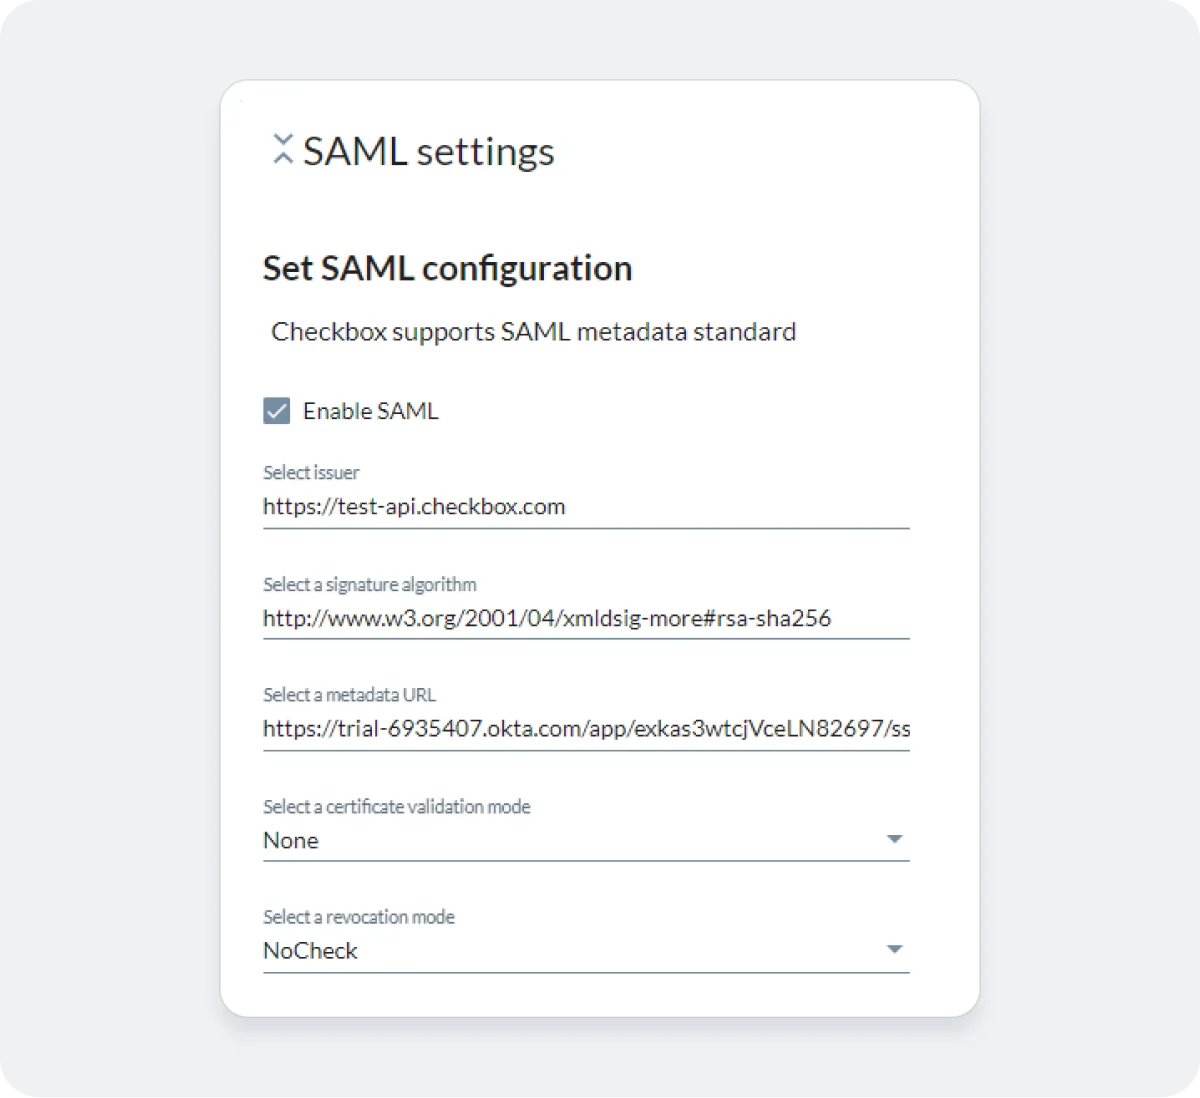
Properties
1. Issuer
Enter the value from your IdP.
2. Signature Algorithm
Enter the value from your IdP
3. Metadata URL
Enter the value from your IdP. More information can be found here.
4. Certificate Validation Mode
For Checkbox Online, this should be "None".
For Checkbox On-Prem, an admin can set additional certificates to Trusted Root Certification Authorities and select other values.
5. Revocation Mode
Select "NoCheck". Other options may be supported in the future.
Example
Instructions for Specific Identity Providers
You'll find documentation for certain Identity Providers in the "Related Articles" below. If you don't see your particular Identity Provider listed, send us a note at support@checkbox.com! We'd love to discuss.
