How to share your survey via email
Checkbox allows the users to send the survey through the built-in email facility. While the users can share the survey through their personal email applications, the Checkbox email campaign feature comes with the following advancements:
- Schedule your emails
- Send follow-ups and reminders
- Track respondent status
- Track bounces and opt-outs
Campaign links can also automatically log your respondents into Checkbox if you want to send your emails to Contacts in Checkbox.
Creating a Checkbox Email Campaign
1. Import Your Respondents (optional)
In order to send the email to the registered Checkbox Contacts, users are required to import their respondents into the contacts before setting up the campaign. This is helpful when you want to associate the profile properties such as name, company, etc. with the responses. Check out our Contacts import guide for more information.
You can simply copy and paste the email addresses directly to the campaign if you don't want to import the contacts.

2. Create a New Campaign
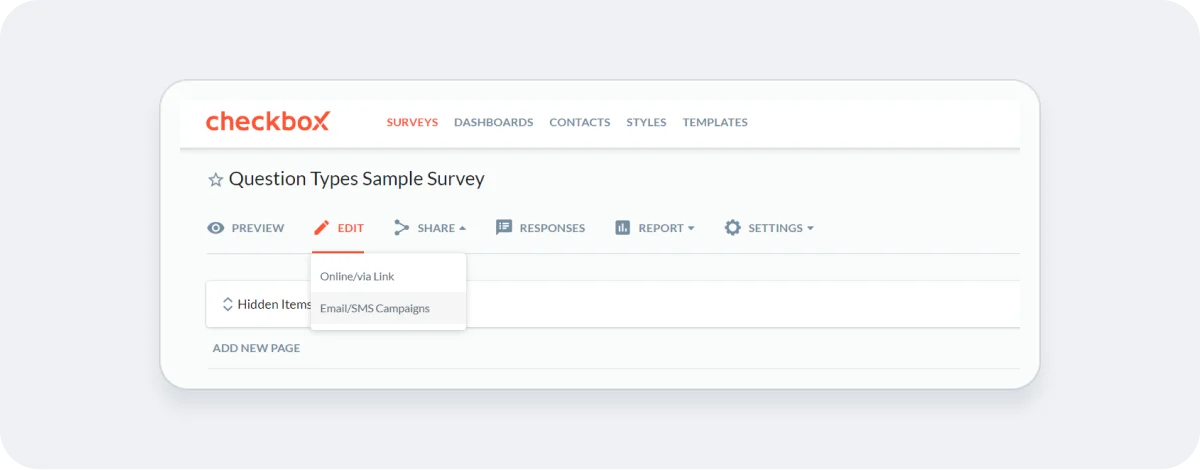
Navigate to the “Share” tab of your survey and select “Email/SMS campaigns” from the menu.
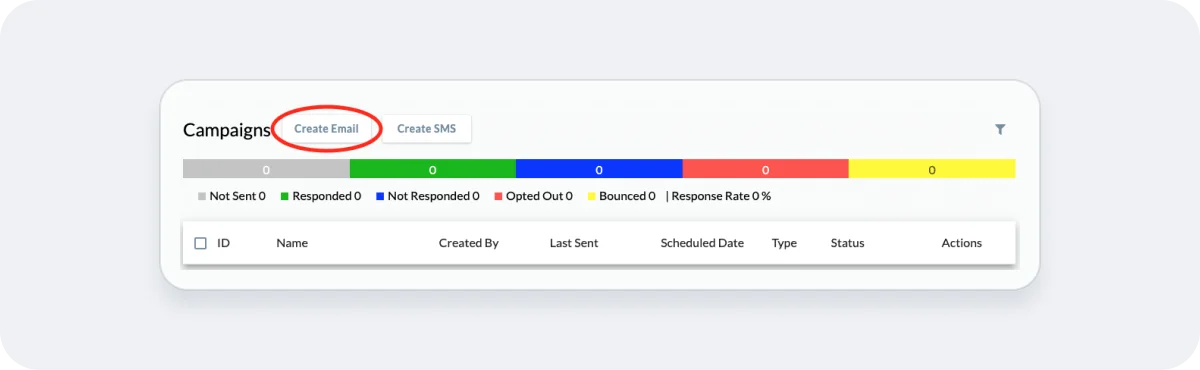
From the next page, click on the “Create Email” button
3. Set Campaign details
From the next pop-up page:
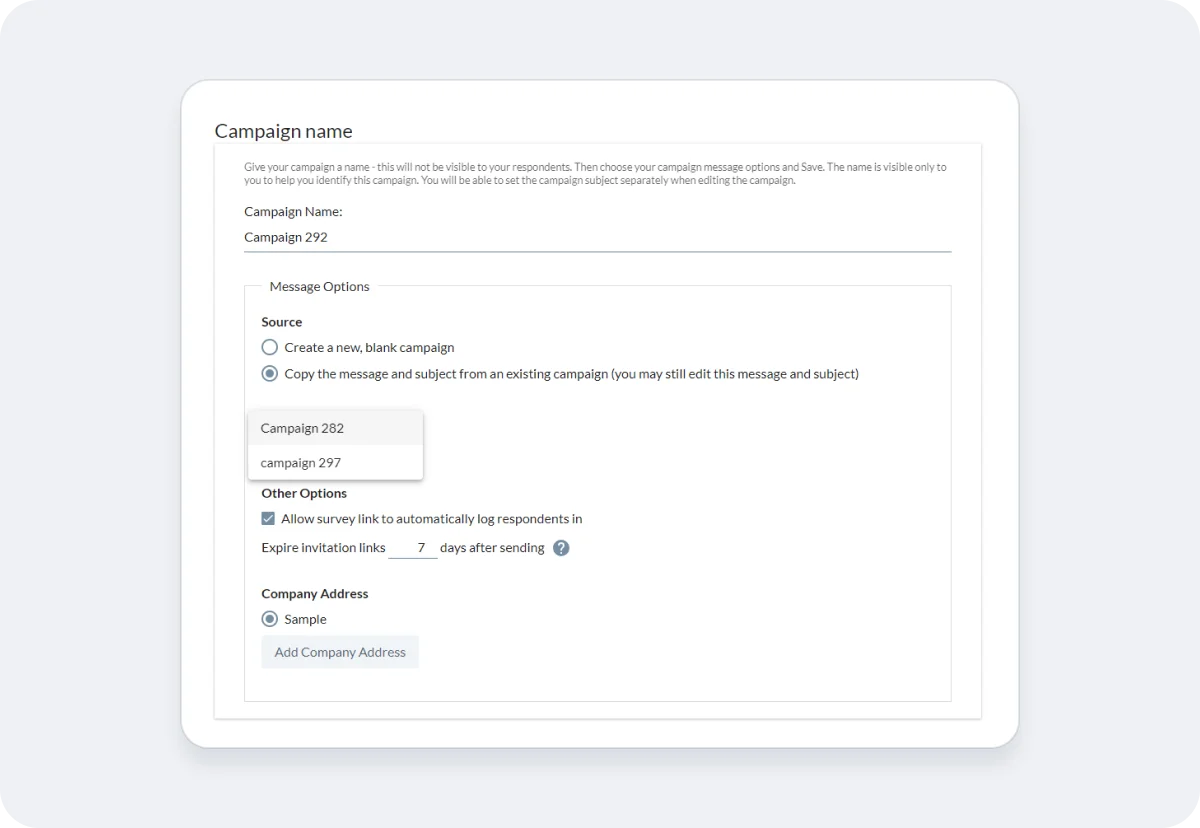
- Give your email campaign a name. This will only be visible to you and not to your respondents.
- You can pick whether to add a message and email subject from an existing campaign or to create a new blank campaign. If you pick the former, a drop-down will appear that will let you pick the campaign to copy the message and the subject from.
- You can decide whether or not to automatically log respondents in to your survey. This option is only relevant if the email is being sent to the already registered contacts or groups in Checkbox. If remains unchecked, this option will make sure that the contacts are required to enter their username and password to take the survey.
- Set the activation period of the invitation links. By default, this is set to 7. This means that the respondents will not be able to access the survey after 7 days of receiving the email.
- Add a new Company Profile or choose one from the list. The Company Profile includes your organization’s name and mailing address – it is required on Checkbox-hosted accounts and recommended for Checkbox on-premises accounts to comply with anti-spam laws. The address information from the Company profile will be automatically merged into your email – see step 4.5 below.
- Click on “Save” once you have set up these details.
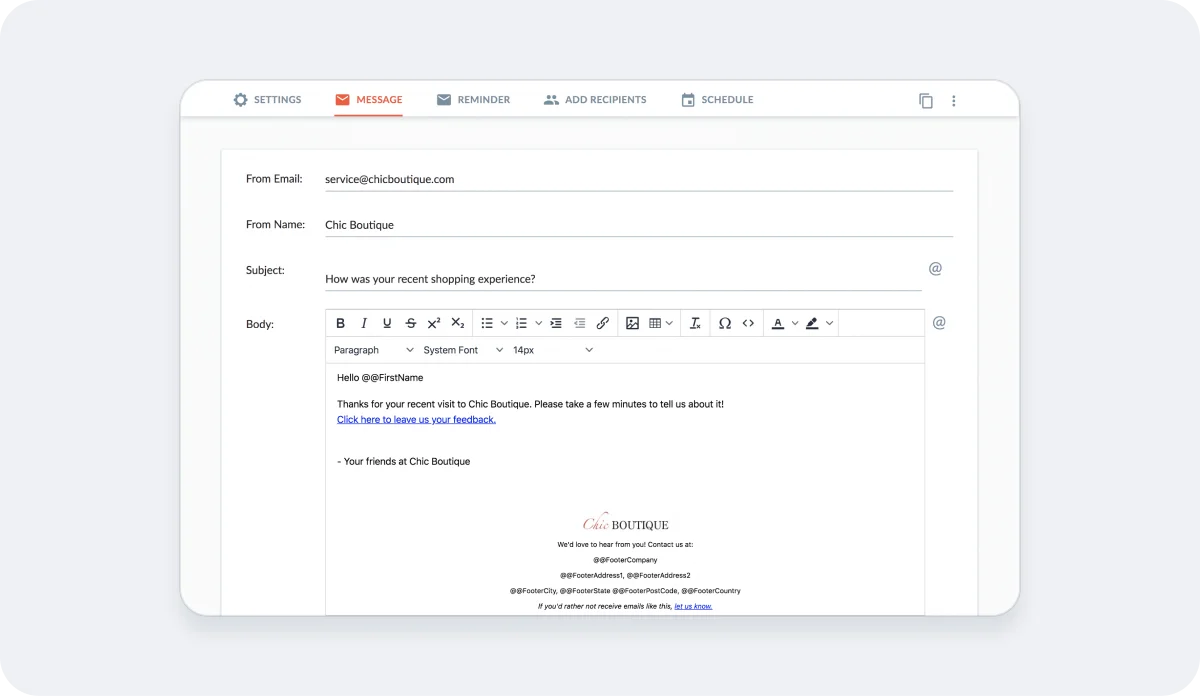
4. Customize Your Email Message
- Enter the From Email, From Name, and Subject for your email.
- Enter your email message in the text box provided. Use the formatting options or custom HTML to customize fonts, add images, and further brand your email.
- Within the subject and message text fields, you can click the @ icon to merge in Contact profile information, such as First Name and Company. Note that merging will only work if you are sending your email campaign to registered Checkbox Contacts or Groups (versus just email addresses).
- You can click the <> button to edit the display text for your survey link and unsubscribe link but do not delete these links or modify the “href” code for these links, as you will break your respondent tracking. If you have any questions about how to safely modify these links, please contact support prior to sending your email campaign.
- You can change the formatting and placement of your company footer merge codes, but you must ensure that your email message includes the following merge codes or it will not send: @@FooterAddress1, @@FooterCity, @@FooterState, @@FooterPostCode, and @@FooterCountry.
- Click Save.
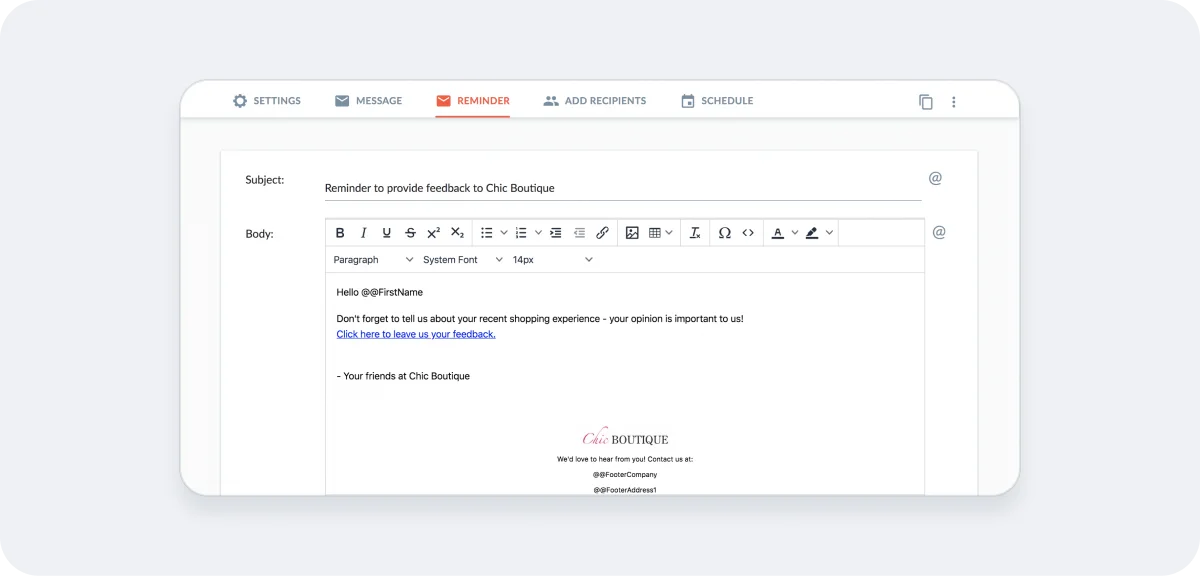
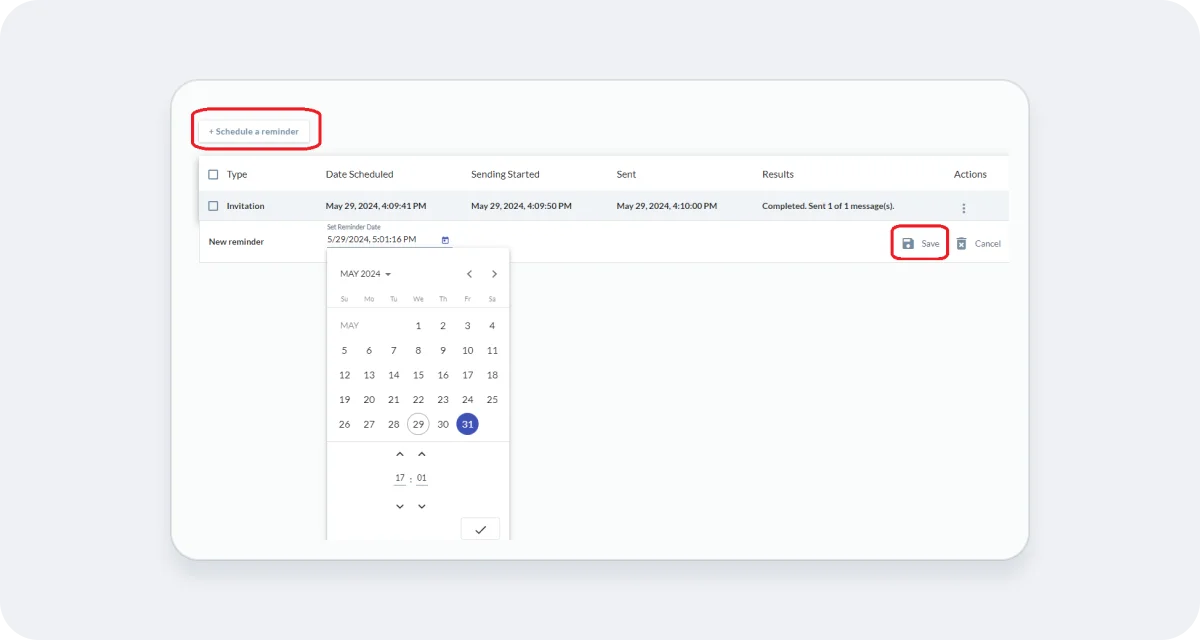
5. Customize the Reminder Message (optional)
Checkbox allows you to set up reminder messages against your campaigns. These messages are only sent to the contacts who have not yet attempted the survey. You can customize the reminder message and subject of your reminder email.
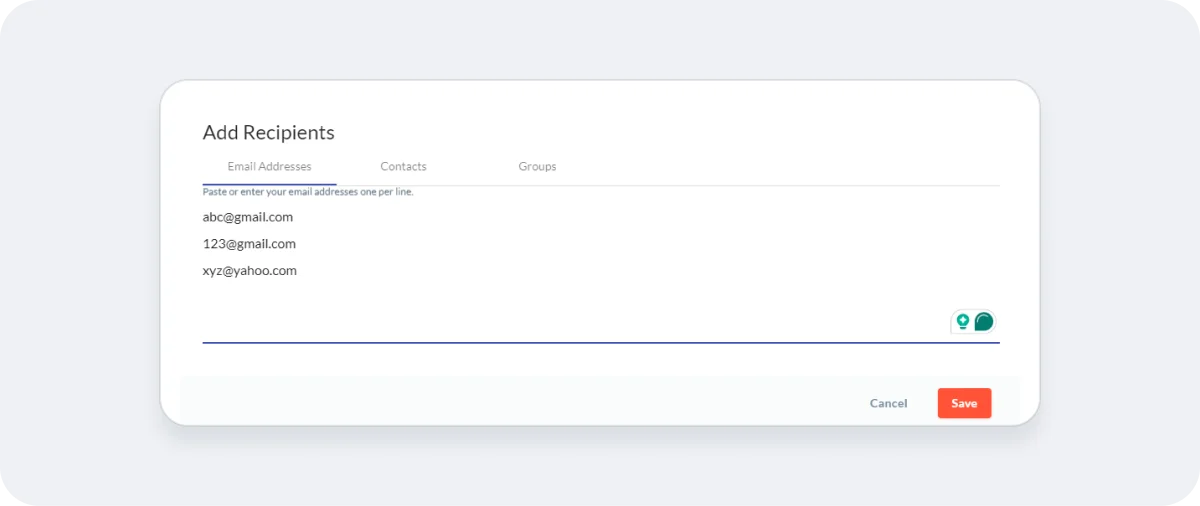
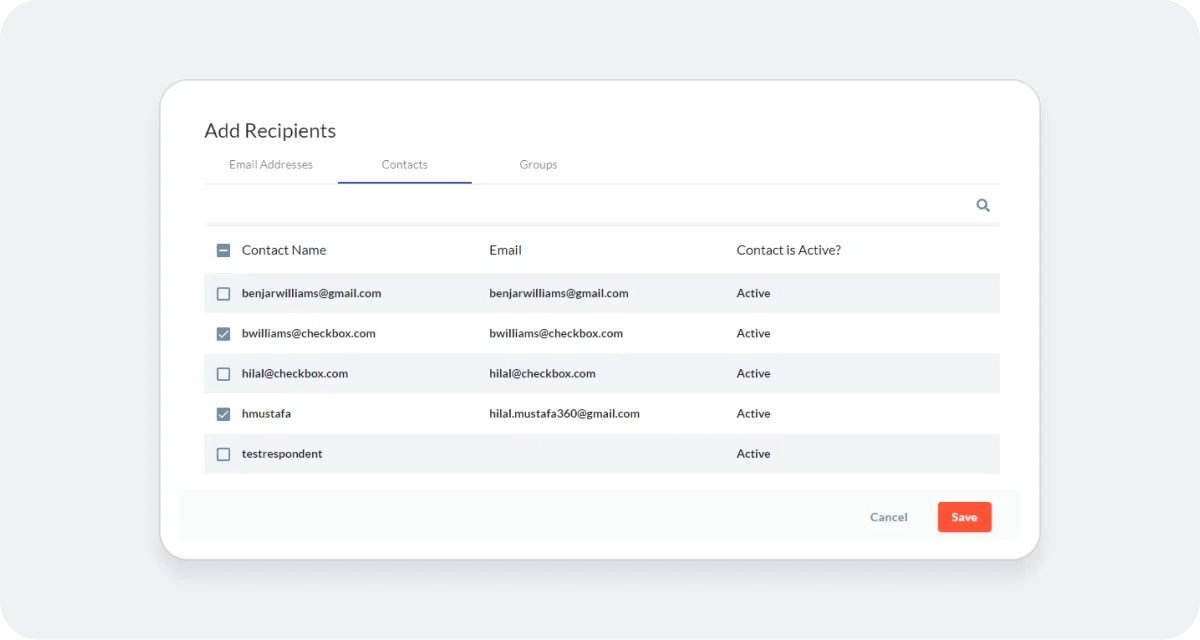
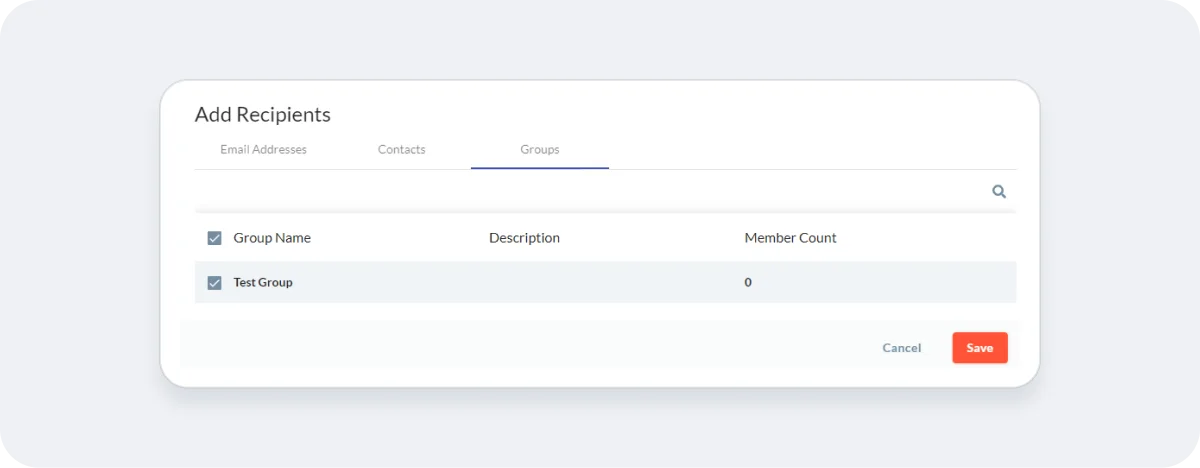
6. Add Your Recipients
Once you click on the “Add recipients” tab of the campaign you can set up the contacts who you wish to send the survey to. Click on the “+Add Recipients” button to add the respondents.
From the menu that appears, select the type of recipient you would like to add from the three available options:
- Email Addresses – Copy and paste or type email addresses into the text field, one per line.
- Contacts – Respondents that you have imported into the Checkbox Contacts area. See this guide for more details.
- Groups – Contact Groups that you have created in the Checkbox Contacts area. See this guide for more details.
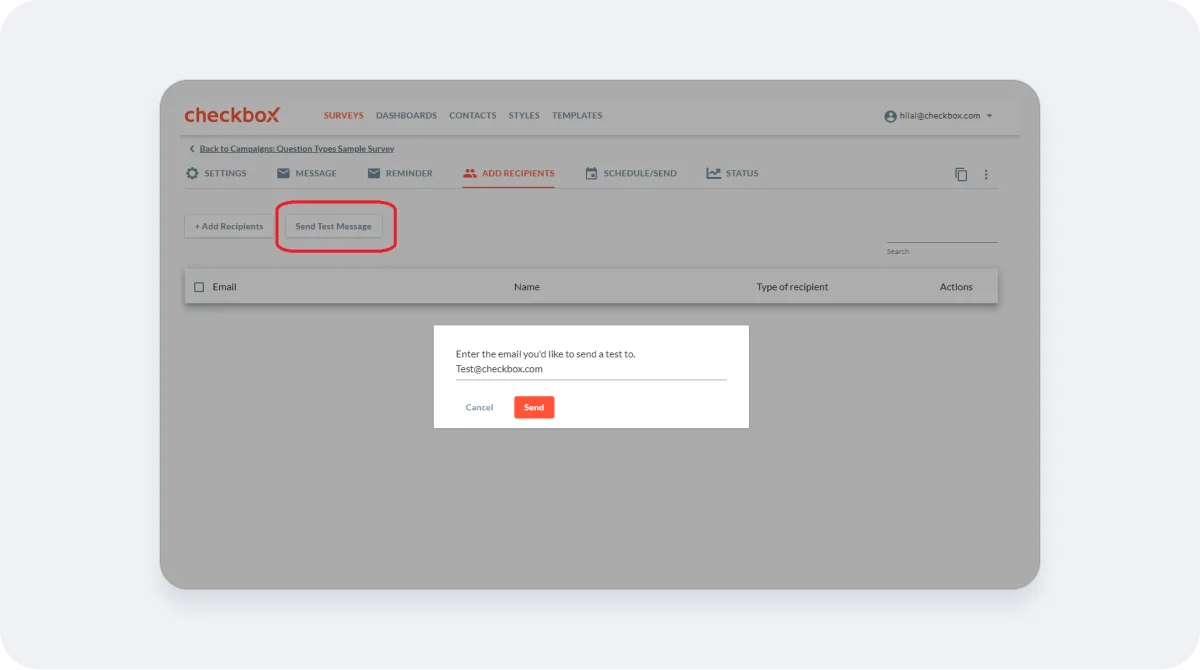
To see how your email appears to your recipients, you can click on the “Send Test Message” button and add your email to the popup menu. This will instantly send you a test email as if you are a part of the campaign.
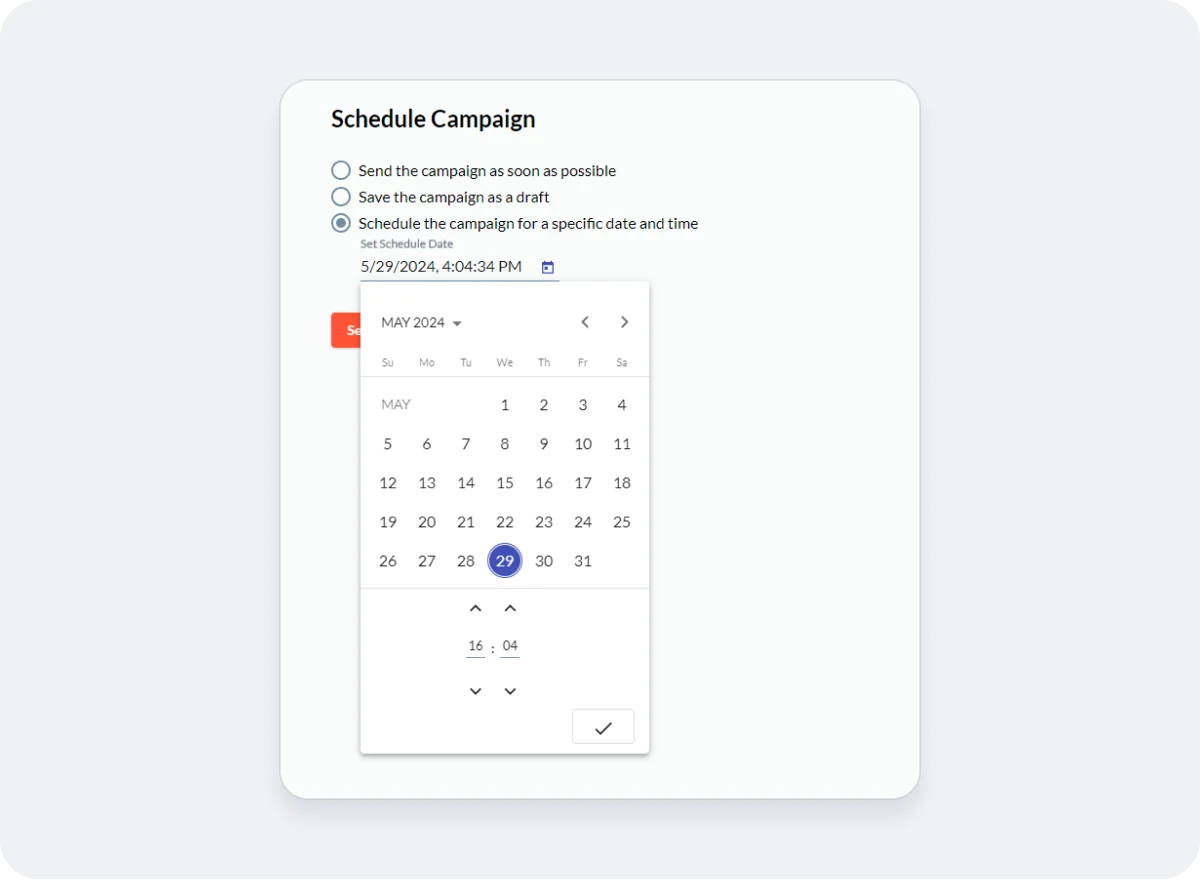
7. Send or Schedule your Campaign
Go to the “Schedule/Send” tab to set the sending timeline of the campaign:
- Send the email campaign as soon as possible: The email will be queued to send as soon as you select Send.
- Save the campaign as a draft for later sending or scheduling: This will save your campaign with the applied settings for you to send later. You can go to your campaigns tab to view the draft campaigns.
- Schedule the campaign for a specific date and time: Pick a date and time to schedule your campaign
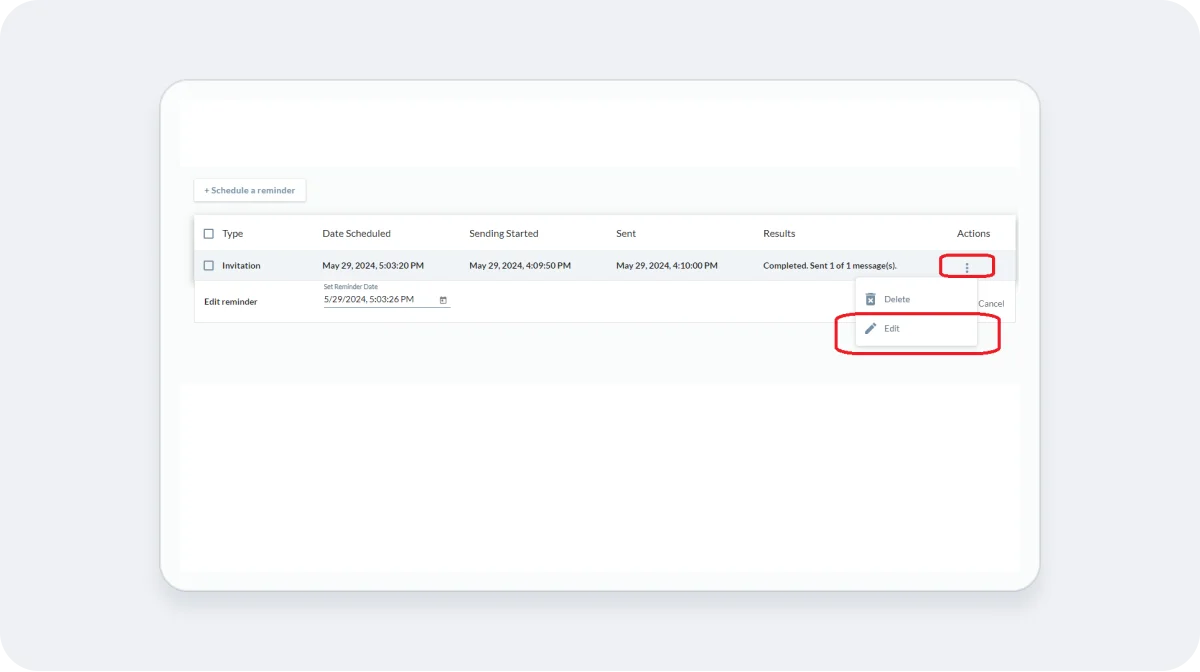
8. Modify Campaign Schedule
Scheduled emails can be modified up until the point that they are queued for sending (generally about 5 minutes before your scheduled send time). To edit your email campaign schedule, click the Edit option under the 3-dot icon on the Schedule tab.
9. Status of the Campaign
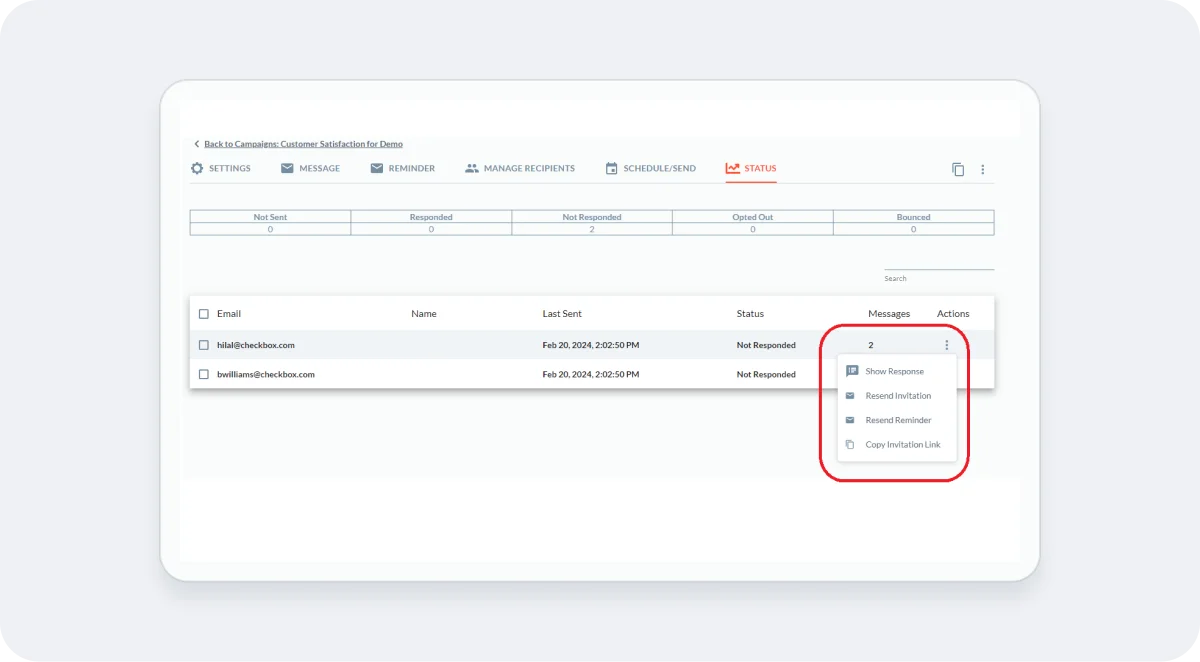
You can check the status of the campaign along with how many of your contacts are at what stage of the campaign by going to the “Status” tab of the campaign.
This page shows you a table of where your respondents stand in terms of completing the survey. There are 5 possible cases against each contact:
Not sent: When the invitation email is not yet sent to the respondent.
Responded: When the respondent has attempted the survey.
Not Responded: When the respondent has received the survey email but has not yet responded to it
Opted out: When the respondent has selected “opt-out” from the footer of the email.
Bounced: When the recipient's email is not found or the firewall has restricted the email from them.
In addition to these details, you can check the response of the respondent, resend them the invitation to the survey, send a reminder or copy their invitation link by clicking on the 3 dots next to their emails in the list.
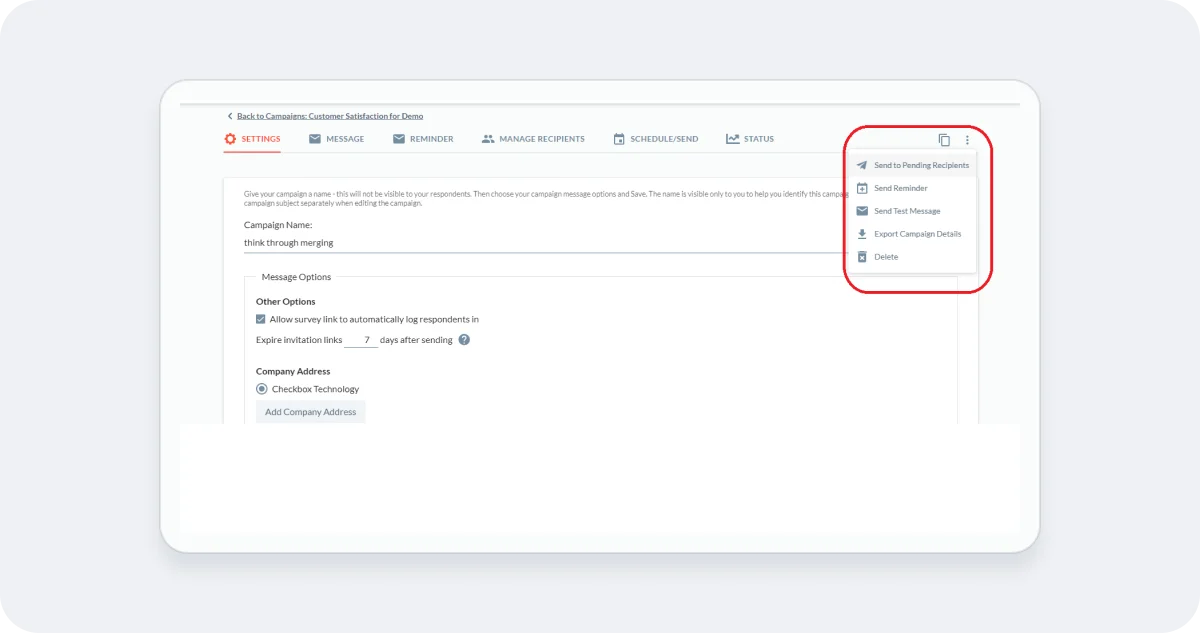
10. More Settings
In any of the tabs of the campaign page, you can see the 3 dots appearing on the right top corner of the page. When clicked, it shows a menu with the following options:
- Send to pending Recipients: Sends the invitation email to the recipients who have not yet been sent the email.
- Send Reminder: Sends a reminder to all the remaining recipients.
- Send Test Message: Allows you to check the appearance of the email by sending you a Test invitation email.
- Export Campaign Details: Allows you to download a detailed spreadsheet that contains the status of the respondents along with other information.
- Delete: Deletes the campaign altogether along with the data.