

Using the standard report to view results
If you’d like to view and/or share your survey results quickly and easily, the Standard Report (formerly known as the Quick Report in version 6) is a handy tool. The Standard Report, which can be found on the Report tab of your survey, is automatically generated by Checkbox and will include charts and graphs for all your survey questions. It can be viewed, exported to PDF, and shared via link.
How it Works
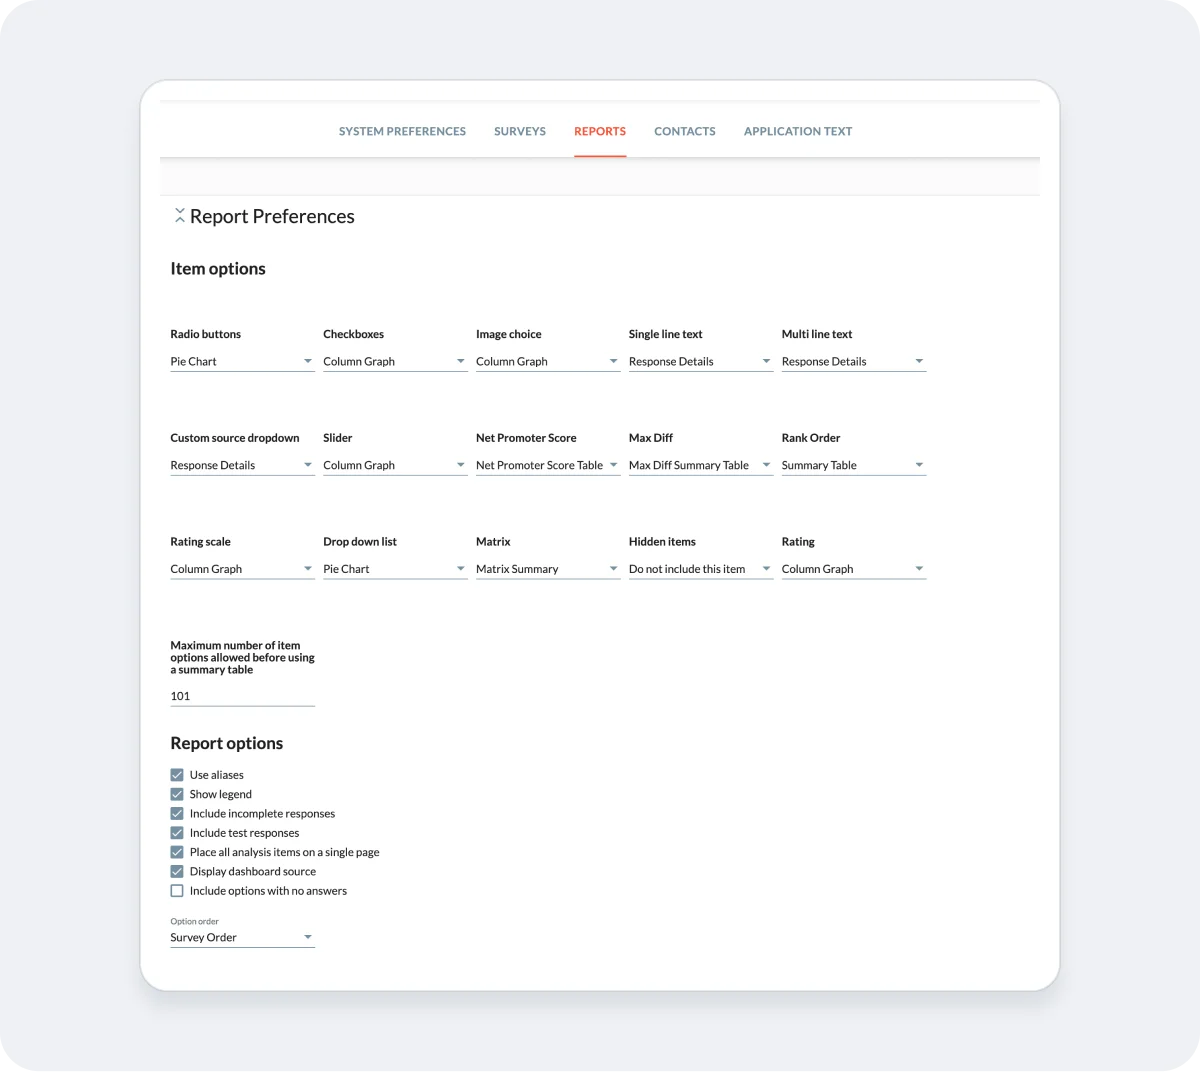
When you click the Report tab for your survey, a Standard Report that includes charts for all your survey questions will be automatically generated. This report is created based on the question types in your survey and the default report settings located in Accounts Settings -> Reports. Your account’s System Administrator can change these settings at any time, which will affect all Standard Reports in your account.
*Important Note: If your report isn’t showing the latest edits to your survey or changes to chart types, click the Refresh icon (curved arrow button) on the View tab of the report to ensure you are seeing the latest updates.
Editing Existing Charts
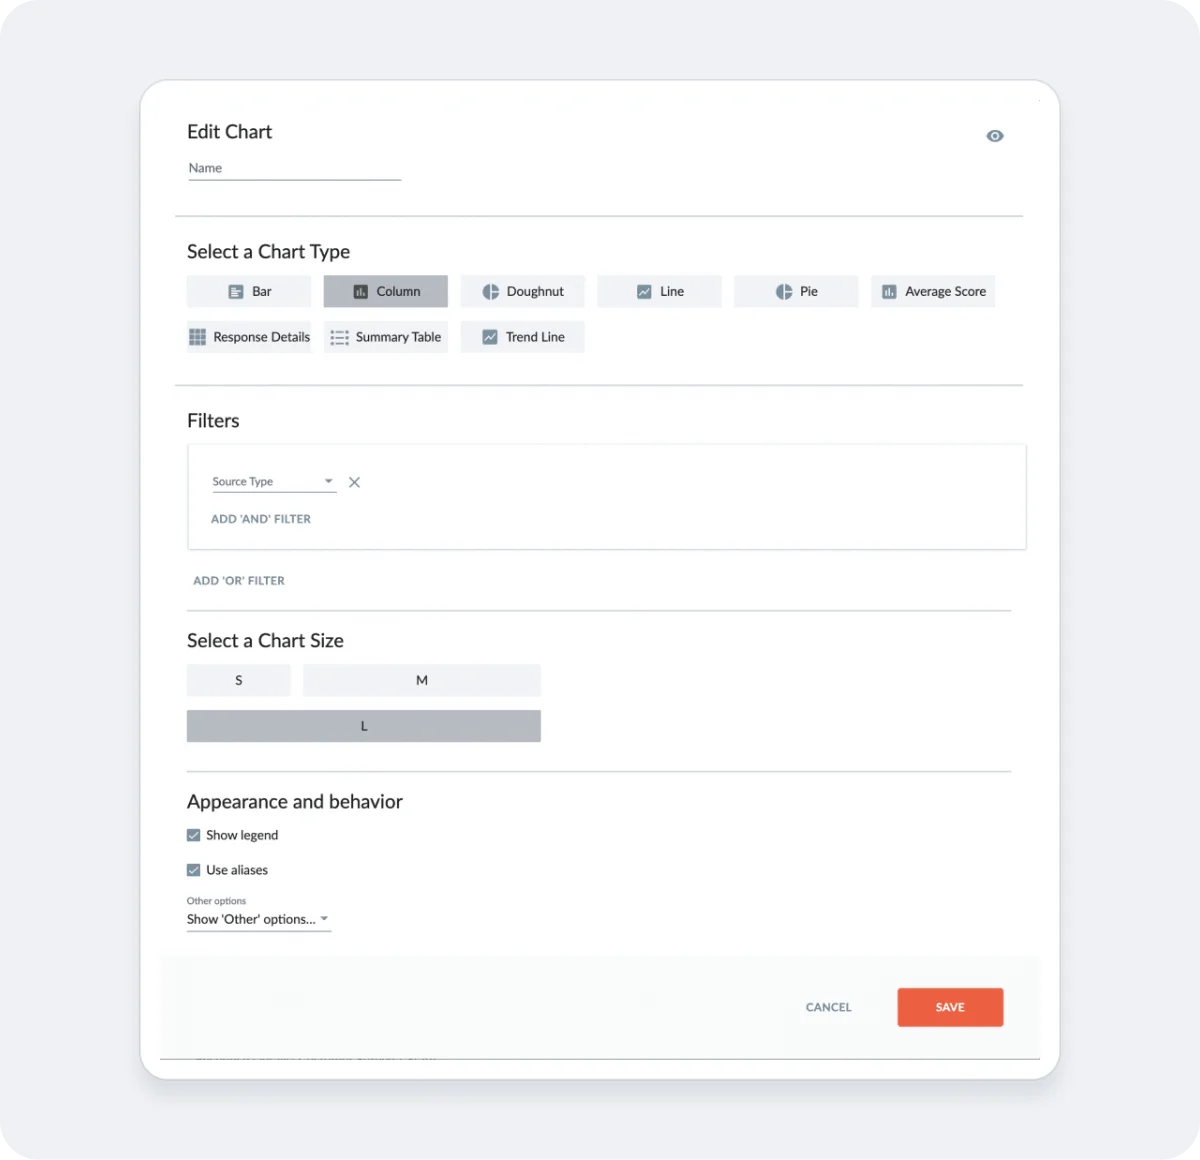
While the Standard Report is automatically generated, you do have some options if you’d like to edit the charts in your report. From the Edit tab of your report you can:
- Change chart types by clicking the Edit (pencil) icon next to any chart and selecting a new chart type. Note that only the chart types that are valid for the selected question type will be displayed.
- Add a filter to the whole report by clicking the Add Report Filter button. Learn more about filters in our Report Filters guide.
- Add a filter to any chart by clicking the Edit (pencil) icon next to any chart and selecting filter options.
- Change chart size by clicking the Edit (pencil) icon next to any chart and then choosing S, M, or L.
- Change appearance/behavior settings by clicking the Edit (pencil) icon next to any chart and changing the settings options.
- Hide a chart by clicking the “eye” icon. *Note that automatically generated charts cannot be deleted due to the way that they are automatically created, but you can hide/unhide them from view using this option.
Adding Charts to the Standard Report
You can supplement the Standard Report by adding additional charts such as Crosstabs, Average Score and Trend Line graphs. Unlike auto-generated charts, custom charts that you add to the Standard Report can be moved by dragging and dropping them into position and can be deleted.
*Note that, unlike Dashboards, Standard Reports only allow you to add charts from a single survey. If you’d like to report on multiple surveys in the same report, click the Copy icon from the Edit tab of your report and copy your Standard Report into a Dashboard.

Standard Report Settings
Your Standard Report includes several settings that you can enable/disable for each survey’s report:
- Display dashboard source: This setting allows you to display the survey name and question for each chart above the chart title.
- Use aliases: This setting will cause your report to display alias text if you have specified alias values for your survey’s questions and answers. For more information on this feature, see our Alias guide.
- Show legend: This setting will show or hide chart legends for all applicable charts.
- Option Order: You can choose how to display the order of your answer options in your charts – in the order they appear in your survey (default), in descending order based on the number of responses for each option, or in alphabetical order.
- Other Options: Let’s you choose if and how to display open-ended answers to questions that have an other/please specify option. You can show “other” text answers in the chart, as a table below the chart, or in both places.
- Include incomplete responses: Choose to include both completed and partial responses in your report results.
- Include test responses: Choose to include both test and non-test responses in your report results.
- Enable Live Filtering for all users: Choose to display the Live Filter icons when you share your report with other users. This will allow them to filter your report to view subsets of the data. If you don’t want other users to be able to drill down into your results, leave this option unchecked.
- Include options with no answers: Display the options with zero responses in your chart legend.

Sharing a Standard Report
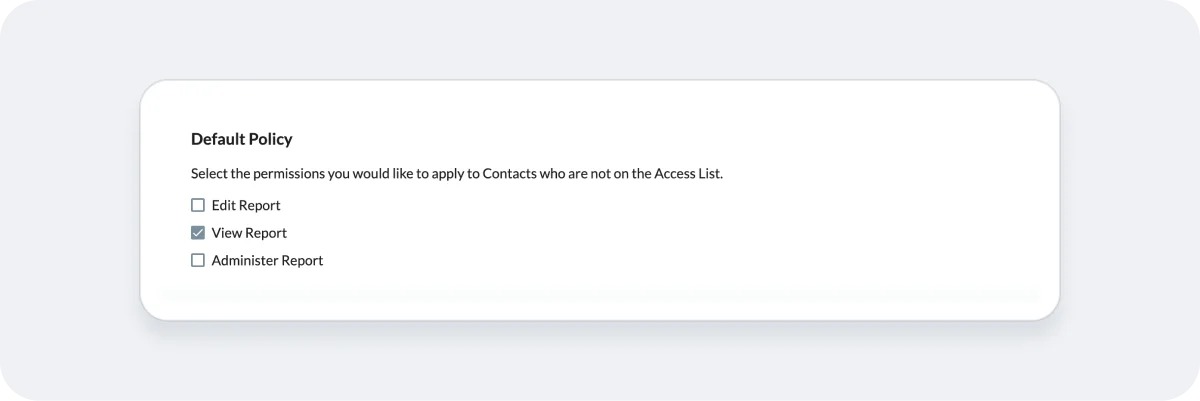
If you go to the Share tab for your Report, you will see a link that can be copied and pasted in order to share your report with other users. In order for someone to access the report, either a) the link has to be publicly accessible or b) the user must be logged in to Checkbox and be on the “Access List” for the report. Click the Report Permissions button to enable either of these sharing options.
To make your Report public, meaning anyone you share the link with (or that they subsequently forward the link to) will be able to view the report, click the Report Permissions button and then select “View Report” under Default Policy.
To share your Report with only certain users, click the Report Permissions button and then add your Contacts or Groups to the Access list. Depending on the options you select, you can choose to give your Contacts/Groups access to view, edit, and/or fully manage your report. Note that Contacts on the Access List will need to log into Checkbox when they click the report link.

