Radio button
Radio Button Deep Dive
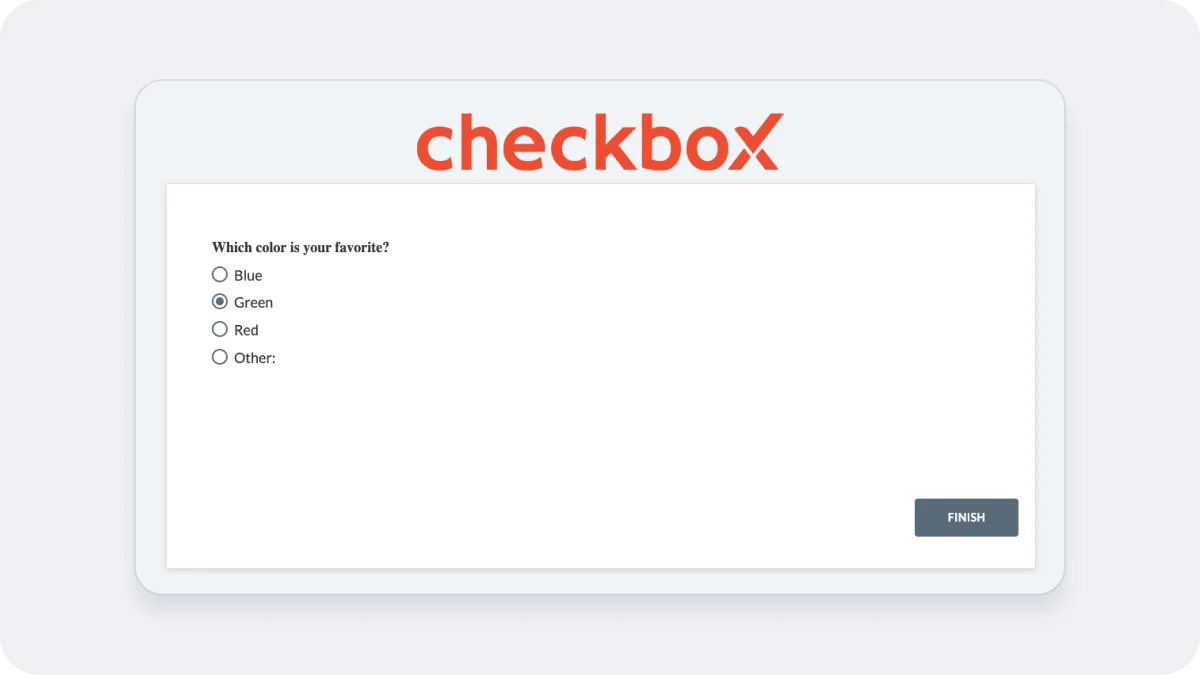
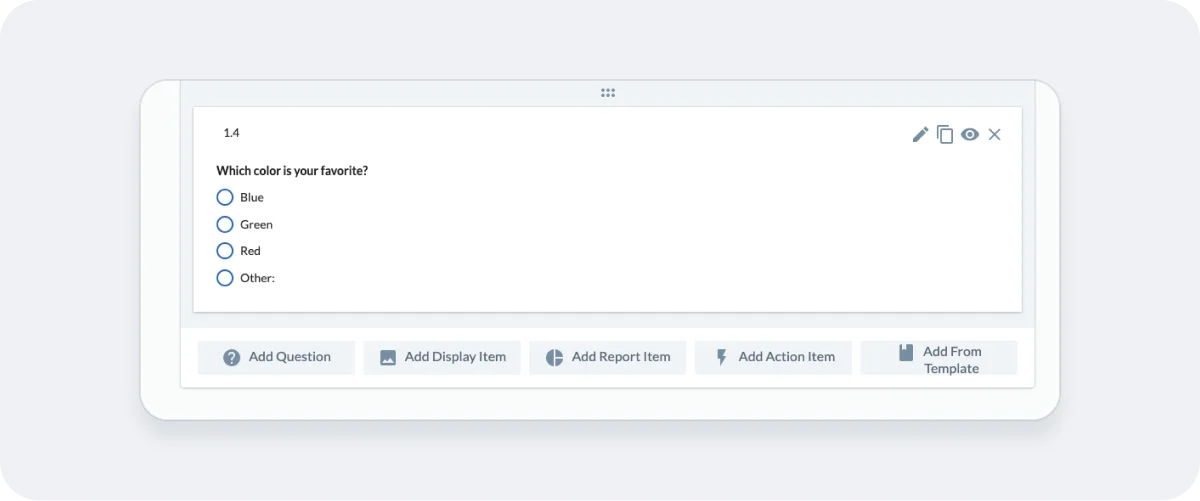
Use radio buttons when you’d like respondents to choose a single response from a list of two or more available options that are mutually exclusive. This means that a customer can only submit a single answer for this question type. If you aren’t sure that the list of potential answers covers all of the potential responses, you can include “other” as an option. This will prompt the respondent to submit a free form text to catch any edge cases.
Checkbox allows you to optimise the formatting of your questions and your responses to the fullest. From styling to changing font style and size to adding a picture or a table to your question, you can completely customize your questions and your answer options.

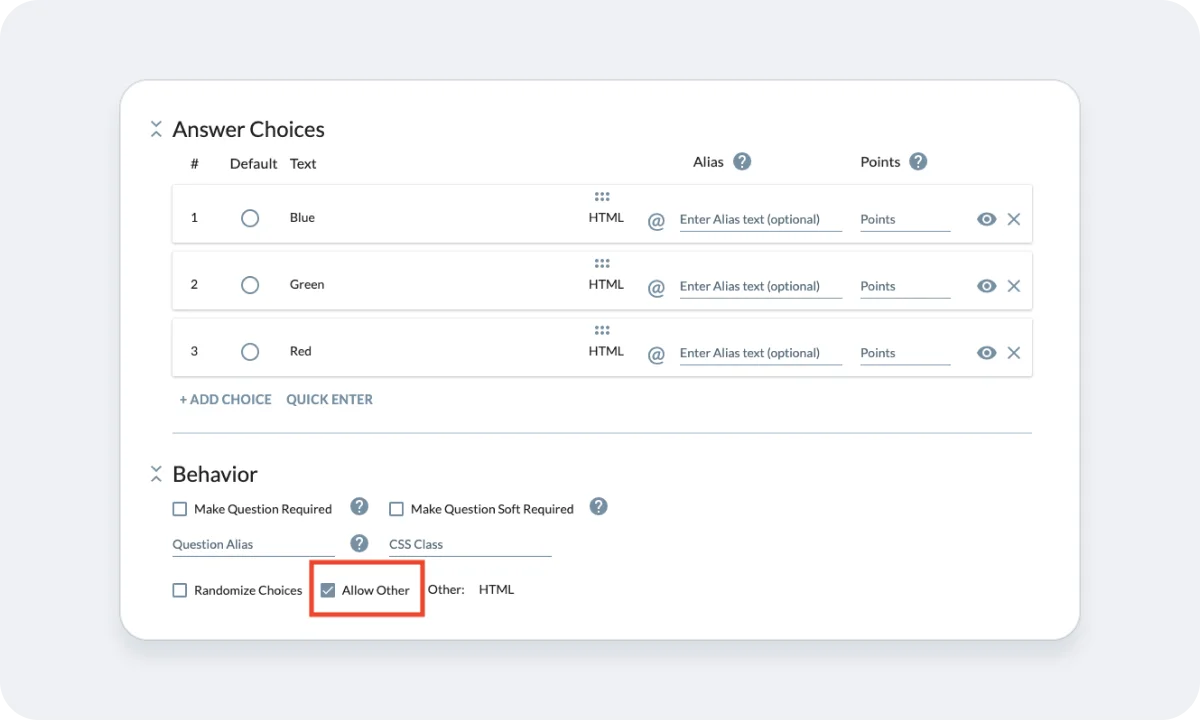
Answer Choices
This section of the question allows you to enter your choices for the given question. Click on “+ADD CHOICE” to add further options.
HTML
Similar to the questions, you can completely change the formatting of the options by clicking on the HTML button against every option. The HTML editor allows you to change the font type and colour that might not be available in our selection and even add images to your answer choices.
Merge Data
You have the option to populate the answer choices by using either the profile properties of the respondent or by using the answer to one of the previous questions of the survey. This can be done by clicking on the “@” button next to the HTML button.
Default
To mark any option as default you can simply click on the radio button available against your provided option.
Alias
Aliases are the alternate texts or codes that you can display on your reports/exports. These values are not visible to the respondent and are helpful when you want to associate a particular value with your provided option.
Points
You can simply assign points to every option of the question and Checkbox will automatically calculate the scores of each question (based on the answer picked by the respondent) and ultimately of your complete survey. See more on How to Create a Scored Survey.

Quick Enter
This option is helpful when you want to manually write each option in a text box. Simply press Enter to separate the options from one another. To make an option a default, it is required to add “yes: against the option, separated by a comma.

Behavior
This section allows you to set different validations for your questions in addition to setting up an alias for your question and deciding whether or not you want to allow the respondent to add an option against the question on their own.
Make Question Required
Checkmark this box if you want the question to be answered as compulsory. The user can not go forward from the current page unless the question is answered.
Make question soft required
Encourages the respondent to respond to the question. The user encounters the message “An answer is recommended, but not required.” if the question is left unanswered in one attempt. Respondents can ignore the message and click “Next” again to go to the next page of the survey.
Question Alias
Aliases are the alternate texts or codes that you can display on your reports/exports. These values are not visible to the respondent and are helpful when you want to associate a particular value with your provided question.
Randomize Choice
Check this box if you want your provided options to be randomly ordered every time a survey is attempted.
Allow Other
Checkmark this box if you want your respondent to add an option on their own. You can change the text prompt and the formatting of this option as well.

Appearance
This section of your question allows you to administer how your questions and your options would appear on your survey page.
Question Text Position
Lets you decide the position of your question with respect to the options. By default, it is set to “Top”. This means that the question will be placed above the answer options
Question position
Lets you decide the alignment of the question (left, middle, right) with respect to the survey page. By default, it is set to “Left. This means that your question will be left indented.
Layout and columns
Allows you to administer whether the provided options would appear in a vertical or horizontal list. The columns allow you to decide in how many columns, the options are going to be divided across the space. By default, Layout is set to Vertical and the Columns is set to 1.
Auto- Number Answer choices
Checkmark this box if you want your provided options to appear in a numbered list (horizontal or vertical).

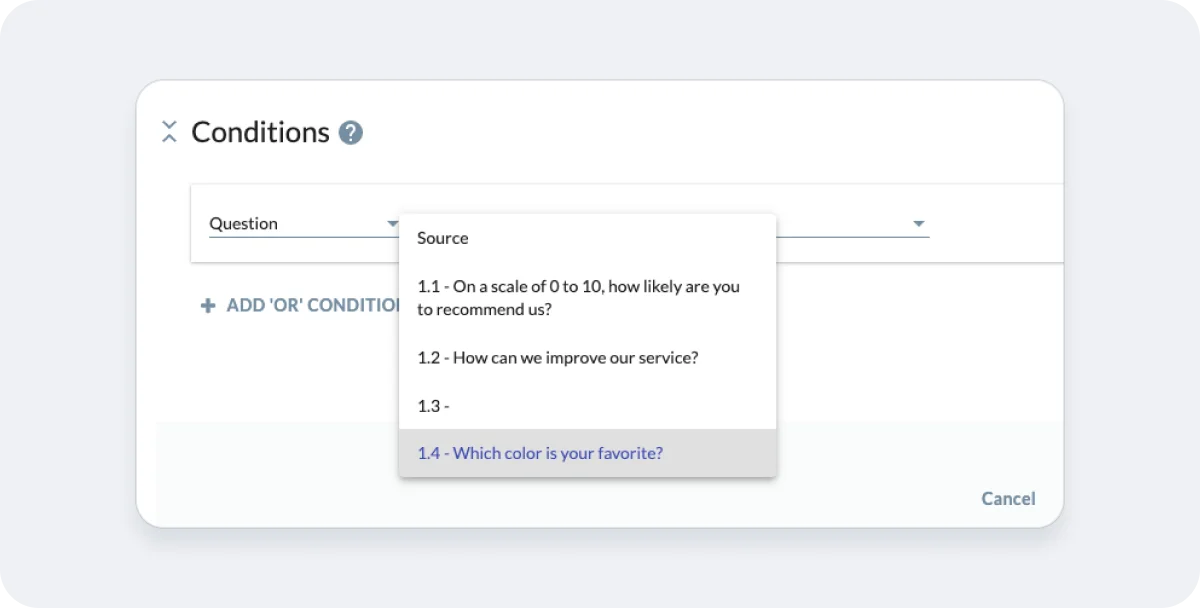
Conditions:
This section of the question allows you to manage the conditional appearance of the question based on either a previous response, a contact attribute or a response property. You can combine 2 or more conditions using “OR/ AND” conditions by clicking on them. Please refer to our “Quick Start: Add a Condition to a Question”.
Common Support Questions to troubleshoot this question type:
Question: I’d like for users to be able to select multiple options, is this supported?
Answer: If you want to allow respondents to select multiple options, you might be looking for the “Checkboxes Question Type” which you can read more about here: Checkboxes Question Type Deep Dive
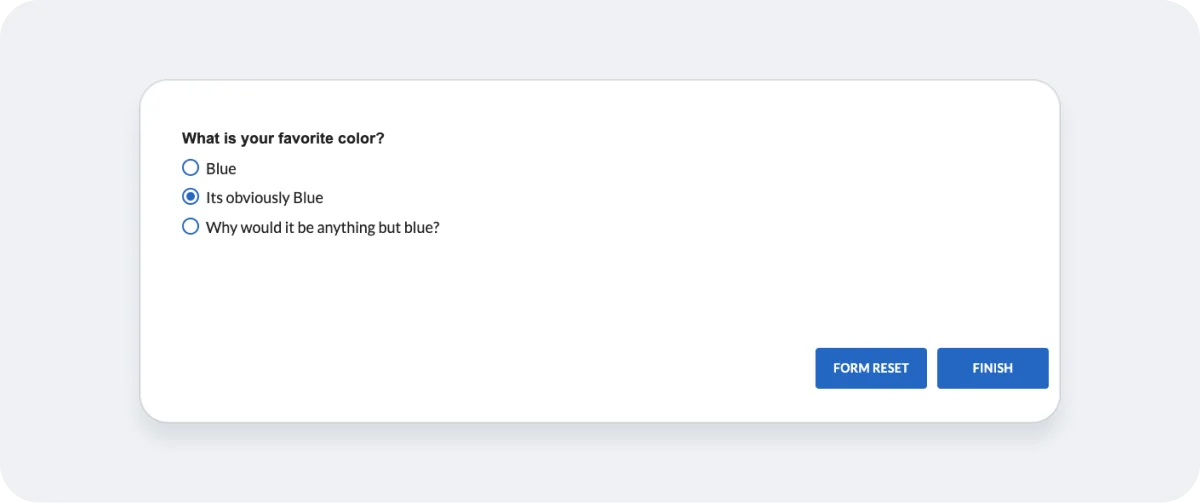
Question: What happens if a user selects a single option and wants to deselect all options to have a null answer?
Answer: Checkbox offers the ability to add a “Form Reset’ Button to the survey page. When you do, users can click that button and all answers are removed from the survey. Here is what they looks like:
Question: I have typed in “Other” as a choice, but it does not prompt my respondents to add additional information.
Answer: To have an “Other” option with a prompt for additional information, you need to go to the “Behavior” settings within the question and select the “Allow Other” box. This will create an additional option with the expected prompt for users. If you would like to collect a specific type of information from users that select “Other”, see the Advanced Use Case below in this article.
Advanced Use Case:
How to use advanced logic and conditions with radio button question types.
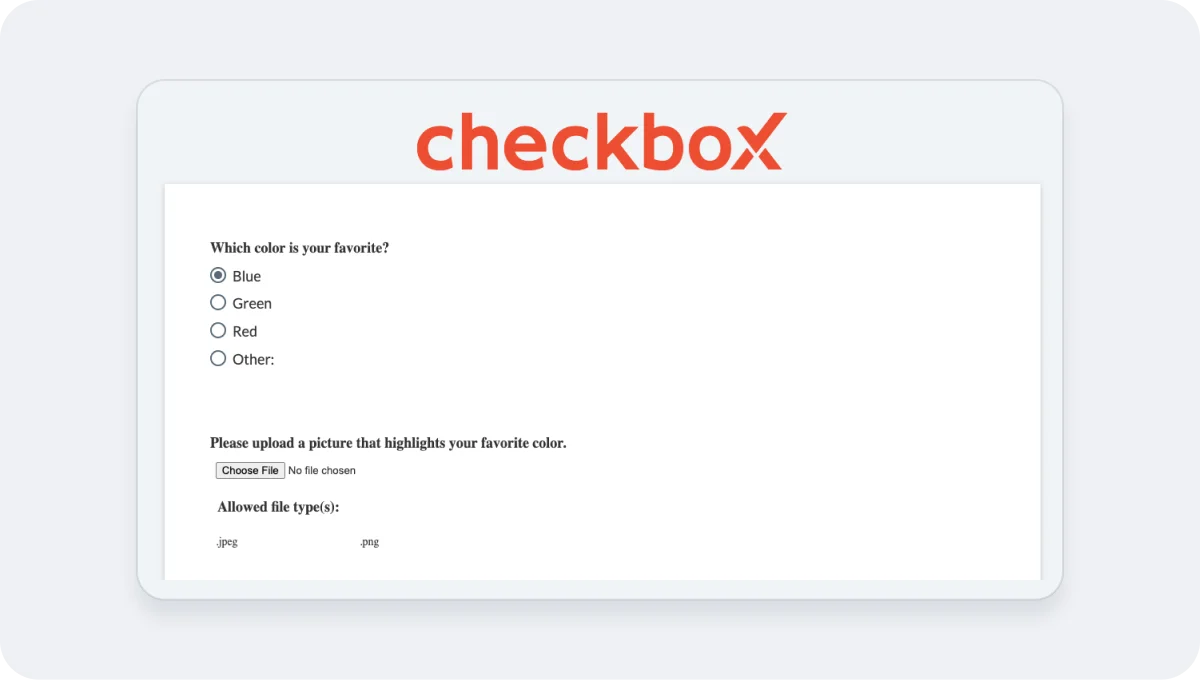
One thing that customers often ask is if they can ask for more information or collect a document from users that select a specific radio button. This is absolutely supported by Checkbox. To get this done, you can use logic to trigger this additional question or action. Here are the steps to driving logic based on the answer from a previous answer:
- Create your original radio button question.
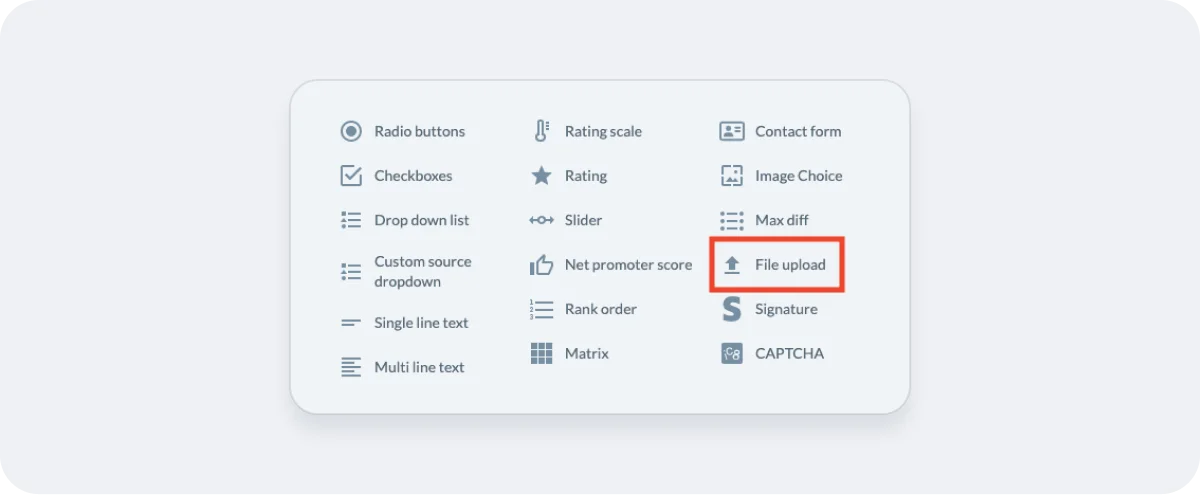
- Create an additional question right after the radio button question that is designed to capture the additional information that you want to collect (free form text, upload document, signature, etc.). In this example, we are going to have the customer upload an image if they choose a specific answer to the original question.
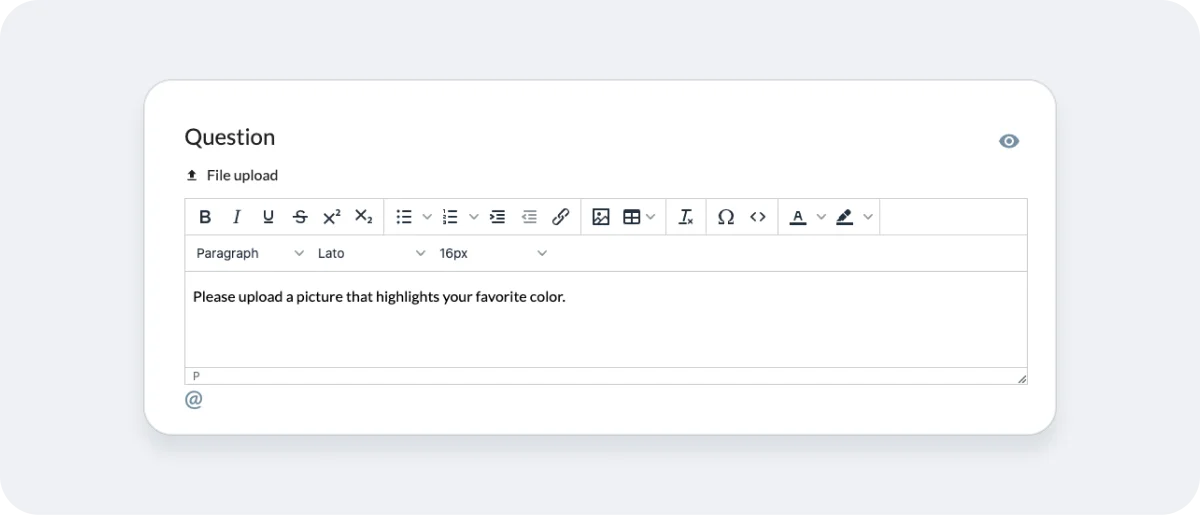
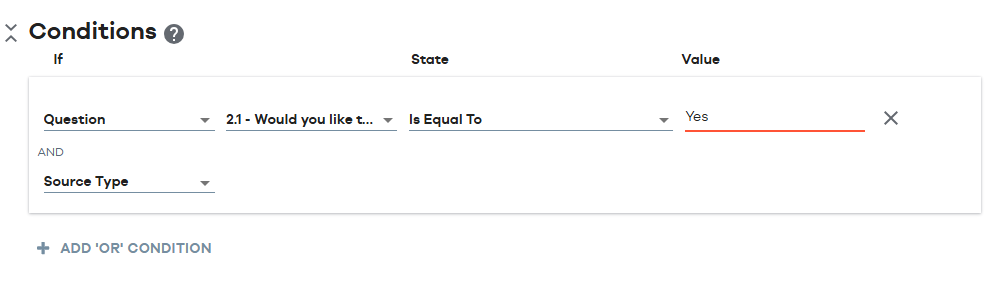
3. After choosing the question type and prompt, navigate to the “Conditions” section and set the logic that you want to accomplish. In this case, we are going to trigger this question to be asked based on the previous question “What is your favorite color?” and then we will only trigger this question to be shown if the customer chooses “Blue” as their answer.
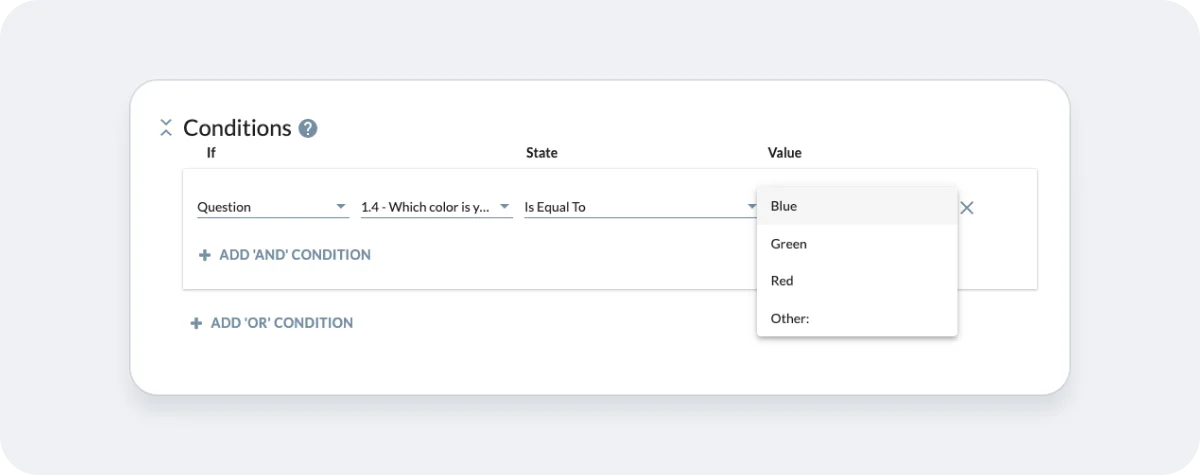
4. This will ensure that when a customer chooses a different answer, then no additional trigger will take place. If they choose Blue however, they will be asked to upload the image.